Photography is, at its most fundamental level, the recording of light. Everything that makes an image compelling — the shadow that defines a cheekbone, the catchlight that brings an eye to life, the soft glow on a subject’s face at golden hour — is a consequence of how light arrives at your subject and how you choose to manage it. Photography reflectors are one of the simplest, cheapest, and most immediately impactful tools available for that management. And the reflective surfaces that appear naturally in the world — water, glass, wet pavements, metal — offer some of the most powerful creative possibilities in all of photography.
This guide covers both dimensions: the practical use of photography reflectors as lighting tools, and the creative use of reflective surfaces as compositional and conceptual elements. Together, they represent a complete understanding of how reflection — both deliberate and incidental — shapes photographic images.
Part One: Photography Reflectors — The Practical Lighting Tool
What Is a Reflector in Photography?
A photography reflector is a surface designed to redirect existing light toward a subject. It does not produce light of its own — it gathers light from an existing source (sunlight, a window, a studio strobe) and bounces it in a controlled direction, typically to fill in shadow areas, reduce harsh contrast, or add a specific quality of light to the subject.
The principle is simple: light strikes the reflector surface and bounces back toward the subject at a predictable angle. The reflected light is softer, more diffuse, and more directional than a secondary artificial light source would be in the same position — because it derives from the same source as the primary light, it is naturally colour-matched and integrates seamlessly with the overall exposure.
Reflectors are used across almost every photography genre: portrait photography to fill shadows on faces, food photography to reveal texture and reduce harsh side shadows, macro photography to add directional fill at close range, outdoor landscape photography to fill foreground shadows, and product photography to control reflection patterns on surfaces.
Types of Photography Reflectors
5-in-1 Collapsible Reflector
The most versatile and most commonly purchased reflector type. A 5-in-1 consists of a central diffusion panel (a translucent white disc) encased in a zip-off outer cover that provides four reflective surfaces: white, silver, gold, and black. Each surface has distinct properties, and the central diffusion panel serves a fifth function as a light diffuser positioned between the light source and the subject.
The collapsible design folds to approximately one-third of its extended diameter — a 43-inch reflector folds to roughly 15 inches for transport. All 5-in-1 reflectors include a carrying case.
Dedicated reflector panels are flat, rigid reflector boards — usually foam core, Styrofoam, or purpose-built photography panels — that provide a single surface without the portability of a collapsible. These are common in studio and commercial photography where permanent setups are practical.
V-flat panels are large (typically 4×8 feet) paired boards that fold into a V shape. Standard studio equipment for high-key portrait and commercial photography — the large surface area produces extremely soft, even fill. Usually white on one side, black on the other.
Circular reflectors (without the 5-in-1 enclosure) are available in single colours — dedicated silver, dedicated gold, dedicated white — for photographers who know the specific surface they need and want the simplest possible tool.
Reflector Colours: What Each Does
White reflector: Produces the softest, most neutral fill light. The white surface scatters light broadly rather than reflecting it specularly, reducing harsh shadows without adding noticeable warmth or colour shift. The safest, most universally flattering reflector colour — appropriate for portraits of any skin tone and for most product photography.
Silver reflector: Produces brighter, more specular (directional) fill than white. The silver surface reflects more light with less scattering, producing a crisper highlight on the subject. Adds a slightly cooler tone. Useful when you need more fill power (in bright daylight conditions where the shadow side of a subject needs significant brightness), for adding specular highlights to product photography, and for fashion and editorial work where a cleaner, more contrasty look is appropriate.
Gold reflector: Produces warm, orange-toned fill that mimics the quality of late afternoon golden hour light. Extremely flattering for warm skin tones and for environmental portraits shot in cooler shade (where the blue sky cast from the shaded light source makes fill from a gold reflector feel natural rather than artificial). Less appropriate for fair skin tones in neutral light conditions — can produce an unnatural orange cast if the overall scene is not already warm.
Black reflector (negative fill): Absorbs light rather than reflecting it. Positioned on the shadow side of a subject, a black reflector deepens shadows and increases contrast — the opposite of fill. Used deliberately when you want more shadow depth in a portrait, when shooting a product where the shadow shape is part of the image design, or when ambient bounce light in a small white studio is filling shadows you want to remain dark.
Translucent white (diffusion disc): The central panel in most 5-in-1 reflectors. Not a reflector in the strict sense — it is a diffuser, positioned between the light source and the subject. Used when direct sunlight or a single hard source is creating harsh, unflattering light on the subject; positioning the diffusion disc between sun and subject converts the hard source into a large, soft source by scattering the light before it reaches the subject. Particularly useful for outdoor portraits in direct sun where moving into shade is not possible.
What Size Photography Reflector Is Best?
The relationship between reflector size and the light quality it produces is direct: a larger reflector produces softer light (because the apparent size of the light source is larger relative to the subject), and a smaller reflector produces slightly harder light.
Practical size guide:
| Reflector Size | Best Application |
|---|---|
| 12–20 inches | Small products, close-up macro, tabletop photography |
| 22–30 inches | Headshots and bust portraits, small food photography setups |
| 40–43 inches | The most versatile size — half and full-body portraits, medium food spreads, outdoor portrait fill |
| 60 inches+ | Full-body portraits, group shots, large scene fill |
For most photographers who want a single general-purpose reflector, a 43-inch 5-in-1 is the recommended purchase. It is large enough to produce genuinely soft fill on a portrait subject from a reasonable distance, portable enough to carry in the field, and the 5-in-1 format provides all surface options in one purchase.
Do You Need a Reflector for Photography?
Not for every type of photography — but for anyone regularly shooting people or products in natural light, a reflector is one of the highest-value purchases available relative to its cost (typically $20–$60 for a quality 5-in-1).
Where reflectors are most valuable:
- Outdoor portrait photography where a single natural light source (sun) creates harsh, uneven illumination
- Fill in backlit outdoor portraits where the face is in shadow
- Food photography to reveal texture on the shadow side of dishes
- Product photography to reduce harsh shadows on one side of the subject
- Macro photography to direct fill light onto small subjects without adding a secondary light source
Where reflectors are less necessary:
- Studio photography with multiple controllable artificial light sources
- Landscape photography where the entire scene is illuminated uniformly
- Street photography and documentary work where introducing equipment changes the character of the situation
- Any context where you have full control over multiple light sources
How to Use a Reflector in Photography: Step by Step
In outdoor portrait photography:
Position your subject so the sun is to one side (or slightly behind and to the side — a 3/4 backlit position is one of the most flattering and commonly used for outdoor portraits with a reflector). The sun provides the key light; the opposite side of the face falls into shadow.
Position the reflector on the shadow side of the subject, angled so it catches the sunlight and directs it back toward the face. Start with a 45-degree angle to the subject and adjust until the reflected light falls where you want it — typically onto the shadow side of the face, adding fill that brightens the shadow without eliminating it completely.
Distance control: Moving the reflector closer to the subject increases the intensity of the fill light. Moving it further reduces intensity. For a natural-looking fill ratio (where the shadow side is visibly darker than the lit side, but not so dark that it loses detail), a fill that is approximately one to two stops below the key light is the target. The further the reflector is from the subject, the softer and lower in intensity the fill becomes.
In outdoor portrait photography in harsh midday sun:
Direct midday sun creates harsh overhead shadows — dark eye sockets, pronounced nose shadow, unflattering chin shadows. Two approaches with a reflector:
Approach 1: Position the subject in open shade (shadow side of a building, under a tree canopy) and use a silver reflector to direct bright sunlight back into the shade area, providing directional light on the face from the shadow-adjacent position.
Approach 2: Use the diffusion disc positioned between the sun and the subject to soften the direct light. The disc must be large enough to shade the entire face — a 43-inch disc works for head and shoulders; for full-body work a larger diffusion panel or a simple piece of white fabric is more practical.
In indoor photography using window light:
Position the subject facing the window as the primary light source. The window side of the face is well-lit; the far side falls into shadow. Position a white reflector on the far side of the subject, angled to catch window light and bounce it back toward the face. A white foam core board or even a white wall works for this purpose — the reflector does not need to be a commercial product.
Holding the reflector:
In solo portrait work, the reflector requires a third hand — either an assistant holds it, a reflector stand (available from most photography suppliers) holds it, or it is positioned against an available object to hold its angle. A tripod with a reflector clamp attachment provides a flexible, adjustable solution for solo photographers.
In practice, many photographers asking a client or subject to hold the reflector below frame during certain setups — the subject holds it below chest level, angled upward toward their face, and the photographer checks the resulting fill in the viewfinder.
In product and food photography:
Position a white reflector card (foam core is the most common material) on the shadow side of the product or dish, perpendicular to the primary light source. Angle it toward the subject until the shadow areas receive sufficient fill without flattening the image completely. For food photography specifically, the amount of fill to apply depends on the aesthetic — minimal fill produces a moodier, more dramatic image with deep shadows; generous fill produces the bright, airy aesthetic common in food blogging.
For macro photography, a small piece of white card placed just out of frame on the shadow side of the subject provides effective fill at close distances.
Part Two: Reflection Photography — The Creative Dimension
What Is Reflection Photography?
Reflection photography uses the reflected images visible in water, glass, metal, mirrors, and other reflective surfaces as a creative compositional element — not just as a technical challenge to manage, but as a deliberate subject or structural component of the image.
At its best, reflection photography creates images that operate on two levels simultaneously: the direct scene and its reflected version, which may be distorted, abstracted, or differently coloured in ways that make the combined image more interesting than either element alone. The reflection adds a surreal quality, a sense of depth, or a visual symmetry that transforms otherwise straightforward scenes into something more complex.
Water Reflection Photography
Water is the most commonly used and most visually varied reflective surface in photography. Still water (lakes, ponds, puddles, flooded fields) produces mirror-perfect reflections that can be virtually indistinguishable from the original subject. Moving water distorts and abstracts reflections into horizontal streaks and rippled patterns that have their own distinct aesthetic.
Still water reflections:
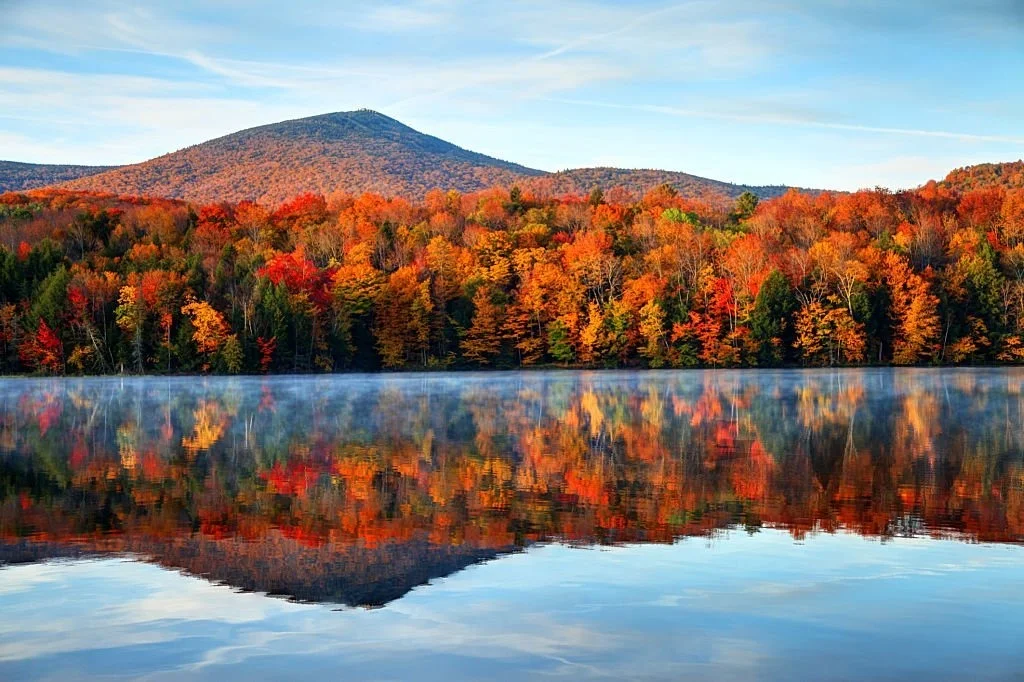
The classic landscape reflection image — mountains reflected in a perfectly still lake at dawn, a cathedral reflected in a flooded square — requires calm conditions and a low camera angle. Position the camera close to the water surface (as low as you can get it without the lens touching water) to maximise the area of the reflection visible in frame relative to the sky and surrounding environment.
Timing is critical. Wind destroys still water reflections. Dawn and dusk are typically the calmest periods. Immediately after sunrise and immediately before sunset, when the direct-sun wind patterns of the day have not yet established or have died down, offers the most reliable still water conditions.
Shooting angle for reflections:
Camera angle determines the balance between the subject and its reflection in the frame. Very low angles emphasise the reflection and may show the reflected image as larger or as prominent as the real subject. Higher angles show the water surface at a more oblique angle, revealing more water texture and reducing the visible area of reflection.
For the classic symmetrical reflection composition — equal parts subject and reflection, divided by the waterline — position the camera so the waterline falls exactly in the centre of the frame horizontally, then compose the image with the subject filling the upper half. This produces the postcard-style reflection image that viewers immediately recognise and respond to.
For more creative compositions, deliberately break the symmetry — position the waterline off-centre, include more reflection than subject, or crop tightly on just the reflected image with the original subject barely visible or entirely absent.
The circular polariser for water reflections:
A circular polarising filter (CPL) rotated to its maximum polarisation position eliminates surface reflections from water — making the water appear transparent rather than reflective. Rotating the CPL to zero polarisation restores the maximum reflection. This control allows you to dial in exactly how much surface reflection you want versus water transparency in any given composition. Our complete guide to circular polarizer filters covers this technique in full.
Puddle reflections in urban photography:
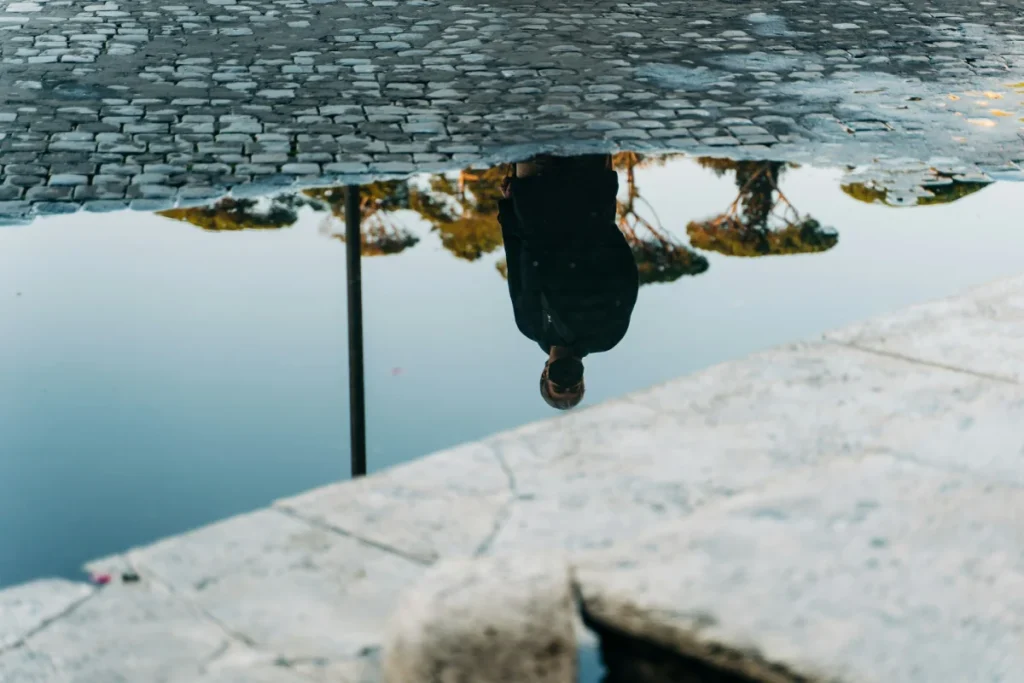
Wet urban streets after rain offer some of the most accessible and visually striking reflection photography opportunities. The combination of coloured artificial lights (neon signs, streetlights, shop windows) reflected in puddles creates vibrant, abstract compositions that bear little relationship to the grey pavement they appear in.
Get extremely low — a camera on the wet ground, shooting parallel to the surface — to capture the maximum extent of the reflection. The lower the camera, the more of the lit environment is visible in the puddle rather than just the sky above.
Long exposure water:
The opposite of still-water reflection photography — using a slow shutter speed (typically 1–15 seconds) to blur moving water into a smooth, silky texture while stationary elements remain sharp. The ND filter techniques covered in our ND filters for long exposure photography guide are essential for achieving the shutter speeds required in daylight conditions.
Glass and Window Reflection Photography
Shop windows and glass facades:
Positioning yourself between an interior-lit space (a shop, a restaurant, an office) and the exterior scene creates a double-exposure-style image where both the interior (visible through the glass) and the exterior reflection (visible on the glass surface) appear simultaneously. The balance between transmission and reflection is controlled by the relative brightness of interior and exterior — if the interior is much brighter than the exterior, more transmission and less reflection is visible; if exterior is brighter, more reflection.
Experiment with your position relative to the glass and the angle of your lens to the surface to control which elements dominate — transmission or reflection.
The CPL for glass control:
As with water, a circular polariser provides direct control over glass surface reflections. At maximum polarisation, glass reflections are eliminated; at minimum, they are at maximum. For street photography involving glass facades and shop windows, this level of control transforms what you can capture through or in the glass.
Mirror Photography: Creative Techniques
Portable mirror as a compositional tool:
A small hand mirror carried to a location creates a portable reflective surface you can position exactly where you want it — reflecting a portion of a scene that would not normally be visible from your shooting position, showing a subject’s face from behind while you photograph their back, or introducing a reflection of the sky into a ground-level composition.
Broken and fragmented mirrors:
A broken mirror creates multiple, slightly offset reflections of the same subject — each mirror fragment shows a slightly different angle. This fragmentation effect is particularly effective for portrait and self-portrait work where the fragmented reflection creates a visual metaphor for complexity or multiplicity.
Mirror self-portraits:
Bathroom mirrors, car side mirrors, and full-length mirrors all provide the material for self-portrait photography that shows the camera — and the act of photography itself — as part of the image. The most successful mirror self-portraits work with this visible camera rather than trying to hide it: the reflection of the camera becomes part of the composition.
Mirrors in landscape photography:
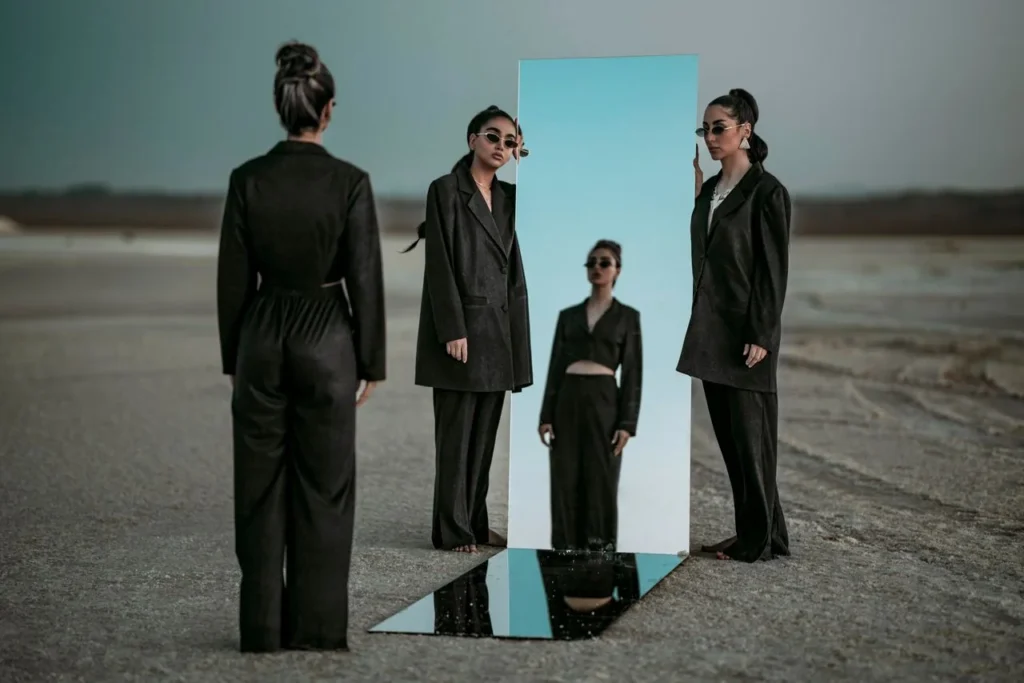
A mirror placed in a natural environment — on a beach, in a forest, in a field — creates a portal effect: a rectangular or oval frame showing a reflection of sky or surrounding environment in unexpected contrast with the natural surface it rests on. This technique has been widely used in fine art photography to create surreal, otherworldly images that draw the viewer’s eye to the contrast between the familiar landscape and its reflected duplicate.
Metal and Polished Surfaces as Reflectors
Metal surfaces — polished stainless steel, chrome, burnished copper, aluminium — produce reflections with their own distinctive character. Unlike mirrors and water, metal surfaces add their own colour cast to the reflection and often fragment or curve it through their imperfect surface geometry.
For product photography: Reflections in the products themselves — a watch case, a car body, a piece of jewellery — can be deliberately shaped to include highlights that make the product look premium and dimensional. The technique of “tenting” a highly reflective product (surrounding it with a diffusion tent so only white is reflected in the surface) is covered in our guide to lightbox and softbox photography.
Combining Reflectors and Reflections
The two subjects of this article — reflectors as lighting tools and reflective surfaces as creative elements — occasionally combine. In outdoor portrait photography by a reflective lake, you might use a gold reflector as a fill light tool while simultaneously composing to include the subject’s water reflection in the lower portion of the frame. In food photography near a window, a white reflector fills the shadow side of the dish while the rain-wet window in the background shows a blurred, atmospheric reflection of the street outside.
Awareness of both dimensions — reflectors as tools you introduce deliberately, reflective surfaces as found creative opportunities — allows you to make use of either or both as circumstances allow.
Combining Reflectors and Reflections
Commercial reflectors are inexpensive enough that making your own is rarely necessary, but the DIY approach produces some useful and flexible options:
Foam core board: The most widely used DIY reflector material. White foam core from a stationery store provides a rigid, lightweight white reflector in any size. Spray paint one side black for a dual-purpose reflector/negative fill board. Cover one side with aluminium foil (crinkled slightly for a more diffuse effect) for a DIY silver reflector.
Emergency foil reflectors: Aluminium foil wrapped around a cardboard backing produces an effective emergency silver reflector. The crinkled surface of typical foil produces a more diffuse reflection than commercial silver reflectors but is adequate for fill at moderate distances.
White bedsheets and white walls: In a home studio context, a white wall opposite a window is effectively a large reflector. A white bedsheet hung opposite a window serves the same purpose for portrait photography. Neither is portable, but both are immediately available in most home environments.
Further Reading
For the circular polariser technique that controls reflective surfaces in both reflection photography and real estate/architectural shooting, our complete guide to circular polarizer filters covers the technique in full detail. For long-exposure techniques that transform moving water from sharp reflection to silky abstraction, our guide to ND filters for long exposure photography covers the complete workflow. For the broader range of light modifiers — softboxes, beauty dishes, strip boxes, and umbrellas — that work alongside reflectors in portrait and studio setups, our guide to light modifiers for portrait photography covers the complete toolkit.
For the portrait photography workflow where reflectors are most frequently used in practice, our portrait photography guide covers lighting setups and outdoor portrait technique in full. For food photography where reflectors provide the fill that reveals texture and dimension, our food photography guide covers the complete lighting approach.
Final Thoughts
A photography reflector is, in isolation, a simple piece of fabric or foam. What makes it powerful is understanding exactly what it does to light — how the surface colour changes the quality and warmth of the reflected light, how distance controls intensity, how angle determines where the light falls. Mastering that understanding takes perhaps an afternoon of deliberate practice outdoors. The payoff is immediate and permanent: every portrait session, every food shoot, every outdoor scene with a strong single light source becomes more controllable and more beautiful.
Reflective surfaces in the world are equally simple in isolation — water, glass, a puddle, a mirror — but equally transformative when approached with compositional intention. The camera that notices a building reflected perfectly in a flooded courtyard, or the puddle that mirrors a neon sign in a rain-dark street, is making images that the camera aimed only at the building or only at the sign would never produce.
Both reflectors and reflections are about the same fundamental thing: understanding that light is not just what illuminates the subject, but what shapes every photographic image from edge to edge.

Charles is a passionate photographer and visual storyteller with a keen eye for capturing authentic moments and timeless emotions. Through here, he combines creativity, technical expertise, and a love for natural storytelling to create images that preserve life’s most meaningful memories. His work focuses on genuine connections, beautiful details, and the unique stories behind every photograph.