There are very few filters in photography that do something post-processing simply cannot replicate. A circular polarizer is one of them. The glare it removes, the sky color it deepens, the reflections it eliminates — none of these effects can be accurately recreated in Lightroom or Photoshop after the fact. What the CPL does, it does only at the moment of capture.
That makes it one of the most genuinely useful accessories a photographer can own, particularly for outdoor, landscape, and travel work. This guide explains exactly how a circular polarizer works, the specific situations where it makes a measurable difference, when to leave it in the bag, and how to choose a quality filter without overspending.
How a Circular Polarizer Actually Works
To understand what a CPL does, you first need a basic grasp of polarized light.
Natural light waves vibrate in all directions simultaneously as they travel. When that light strikes a reflective surface — water, glass, wet leaves, a car hood, a window — the reflected light becomes polarized. Polarized light vibrates predominantly in a single plane rather than in all directions. This is what we perceive as glare: a harsh, washed-out reflection that obscures detail and desaturates color.
A polarizing filter contains a microscopic grid of aligned crystals that acts like a set of venetian blinds for light. It blocks light waves vibrating in one specific plane while allowing waves in the perpendicular plane to pass through. By rotating the filter, you rotate the orientation of that grid — and at the right angle, you block the polarized reflected light entirely.
The result: glare disappears, reflections reduce, colors deepen, and the scene looks more like what your eye perceives on a clear day.
Why “circular” specifically? Linear polarizers also block polarized light, but they interfere with the beam-splitter mechanisms inside modern cameras used for autofocus and TTL metering. A circular polarizer adds a quarter-wave plate behind the linear polarizing element, which converts the linearly polarized light into circularly polarized light before it reaches the sensor. This eliminates the metering and autofocus interference. For all practical purposes, always use a circular polarizer (CPL) with any modern digital camera.
What a Circular Polarizer Does to Your Images
Removes glare and surface reflections
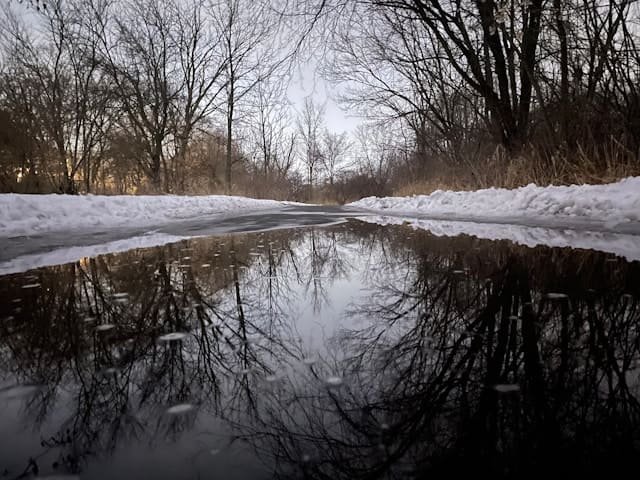
This is the CPL’s most dramatic effect. Pointed at a river, pond, or lake with the filter rotated to the optimal position, the surface reflection disappears almost completely — revealing rocks, fish, and color beneath the water that were previously invisible. The same applies to wet pavement, glass windows, polished wood, and any non-metallic reflective surface.
Note: polarizers do not reduce reflections from metallic surfaces. Metal reflects light differently (it doesn’t polarize the light on reflection), so a CPL will have little effect on chrome, polished steel, or mirrors.
Deepens sky blues
Atmospheric haze and scattered light from the sky is partially polarized. When you rotate a CPL to its optimal position relative to the sun, it filters out some of this scattered light and deepens the blue of the sky noticeably — particularly against white clouds, which become sharper and more dramatic by contrast.
This effect is most pronounced on clear days when the sun is bright. On overcast days when the sky is a uniform white, the effect is minimal because the diffused cloud cover isn’t producing polarized light.
Increases color saturation in foliage
Leaves and vegetation have a waxy, slightly reflective surface coating. This coating creates a subtle glare that desaturates the green tones in foliage. A CPL removes this surface glare, allowing the underlying pigment color to come through — greens become richer, more saturated, and more three-dimensional.
This is one of the most underrated uses of a polarizer. Forest and woodland photography benefits enormously from a CPL even when there’s no water or sky in the frame.
Cuts atmospheric haze
On sunny days with high humidity or pollution, a layer of atmospheric haze reduces contrast and washes out distant subjects. Because some of this haze is composed of polarized scattered light, a CPL can cut through it partially — restoring contrast and making distant hills, mountains, or cityscapes cleaner and more defined.
The 90-Degree Rule: Getting Maximum Effect
The most important concept in CPL use is understanding the angle relationship between your lens and the sun.
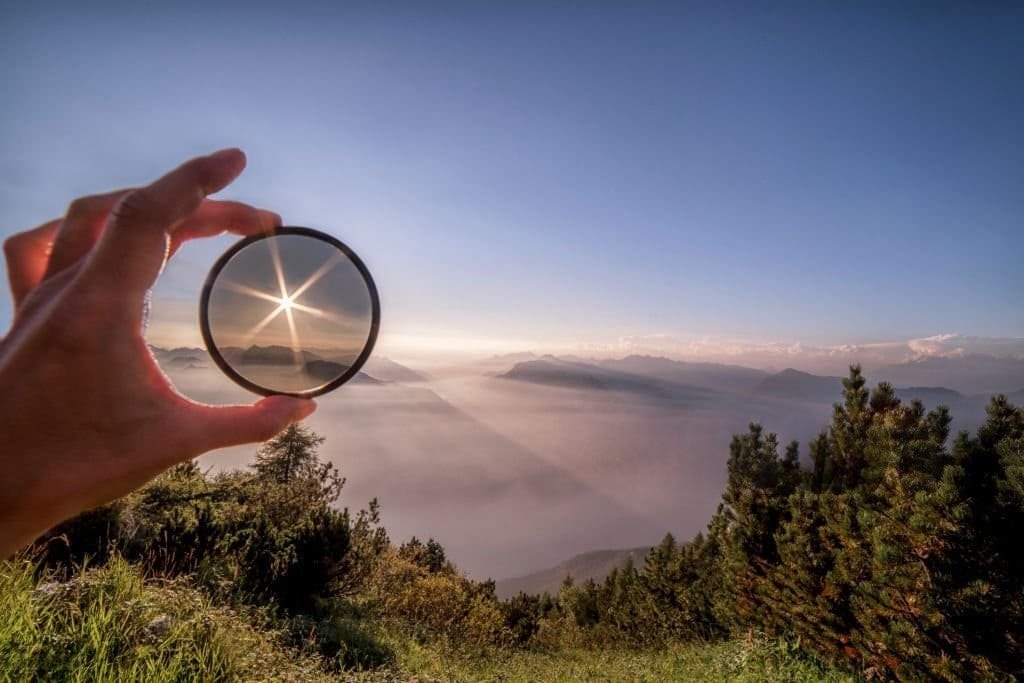
A circular polarizer reaches its maximum effect when your camera is pointed at a 90-degree angle to the sun. If the sun is to your right, maximum polarization happens when you shoot straight ahead or straight behind — not toward or away from the sun.
A practical way to find this zone: make a gun shape with your hand and point your index finger directly at the sun. Your thumb, pointing upward at 90 degrees, indicates the direction of maximum polarizing effect. Sweep your thumb around in a full circle — all those directions represent the zone of strongest effect.
When shooting directly toward or directly away from the sun, the CPL has almost no polarizing effect. You can still use it for the slight light reduction it provides (more on that below), but the glare removal and color deepening will be minimal.
This 90-degree relationship is also why polarizers behave differently at different times of day. At midday when the sun is overhead, the strongest effect is on horizontal subjects. At golden hour when the sun is low, the effect shifts to vertical subjects like walls and tree trunks.
When to Use a Circular Polarizer
Landscape photography with blue sky: The CPL’s most classic application. Rotating to the optimal position against a clear sky with white clouds produces an immediate, visible improvement in almost every shot.
Water and riverscapes: Any time you want to see into or through water — revealing river beds, underwater detail, or simply removing the flat mirror-like surface reflection — a CPL is essential.
Waterfalls and cascades: Wet rocks surrounding waterfalls are highly reflective. A CPL removes this glare and makes the rock textures and surrounding vegetation appear far richer.
Forests and woodland: Reducing leaf glare and deepening greens makes woodland photography significantly more vibrant. This is one of the most overlooked CPL applications.
Street photography with shop windows: If you’re shooting through glass — storefronts, car windows, display cases — a CPL can eliminate reflections and allow you to photograph whatever is on the other side clearly.
Rainbows: This is a special case. Rotating a CPL in one direction will reduce a rainbow (it’s polarized light); rotating in the other direction can intensify and saturate the colors. Experiment with rotation direction to control rainbow visibility.
When NOT to Use a Circular Polarizer
Low light conditions: A CPL reduces light transmission by 1.5 to 2 stops. In a dimly lit forest, at dusk, or indoors, this light loss forces you to slow your shutter speed, raise ISO, or widen your aperture — often introducing motion blur or noise you don’t want.
Shooting toward or away from the sun: At sunrise and sunset when you’re shooting directly into or away from the light, the CPL is near-useless for polarization. Worse, it can introduce lens flare or subtle color shifts. Leave it off during golden hour if you’re shooting toward the light.
When you want the reflection: Reflections of mountains in still lakes, city lights on wet streets, a person’s face reflected in a window — these are often the subject of the photograph, not a problem to be solved. A CPL would remove exactly what makes the shot interesting.
Ultra-wide angle lenses: At focal lengths below about 21mm on a full-frame camera, a CPL creates an uneven sky — because the filter covers a field of view wider than the 90-degree polarization zone, one part of the sky appears deeper blue while another appears lighter. This gradient banding in the sky is difficult to correct in post and looks unnatural.
How to Use a CPL Filter Step by Step
Step 1 — Screw the filter onto your lens. CPLs have two rings: the rear ring screws onto the lens thread, the front ring rotates independently. Make sure the rear ring is fully tightened before you start rotating.
Step 2 — Look through the viewfinder or live view. Compose your shot normally.
Step 3 — Rotate the front ring slowly. Watch the scene as you rotate. You’ll see reflections appear and disappear, sky color deepen and lighten, and glare reduce and return. One full rotation covers all possible positions.
Step 4 — Find the optimal position. Stop at the point that gives you the desired effect. This is usually — but not always — the maximum effect position. Sometimes partial polarization looks more natural than full.
Step 5 — Avoid over-polarizing. Skies can look unnaturally dark and almost black at maximum CPL effect, especially with wide-angle lenses. If the sky looks dramatic but slightly unnatural, back the rotation off 10–15 degrees.
Step 6 — Compensate for light loss. Check your exposure. If you were at 1/250s before attaching the filter, you may now need 1/60s–1/100s. Adjust shutter speed, aperture, or ISO accordingly.
Step 7 — Refocus if needed. On most cameras with modern CPLs, autofocus works normally. If you notice any hunting, switch to manual focus.
Choosing a Quality Circular Polarizer
Filter size: Match the filter diameter to your lens’s filter thread size, printed on the front of the lens barrel (e.g., ⌀77mm). If you have multiple lenses with different thread sizes, buy a filter sized for your largest lens and use inexpensive step-up rings for the others.
Glass quality: This is where you shouldn’t cut corners. A cheap CPL introduces color casts (usually magenta or green), reduces sharpness slightly, and can produce uneven polarization. Budget filters are fine for experimentation, but if this is gear you’ll use regularly, invest in quality glass.
Multi-coating (MRC): Multi-resistant coating reduces internal reflections within the filter glass and improves transmission. Any quality CPL will be multi-coated. Look for this in the product description — it makes a meaningful difference.
Slim profile: Standard CPL frames can cause vignetting on wide-angle lenses because the thick rim enters the field of view at the corners. A slim or ultra-slim CPL profile reduces this risk significantly.
Recommended brands: B+W makes consistently excellent CPLs with strong multi-coating. Breakthrough Photography’s X4 CPL is well-regarded at the premium end. Hoya HD and NiSi offer solid mid-range options. Kenko is a reliable budget-friendly choice for beginners.
CPL vs. ND Filter: Understanding the Difference
A circular polarizer and a neutral density filter are both glass filters that attach to your lens, but they do completely different things.
A CPL selectively removes polarized light — its primary purpose is improving image quality by eliminating glare, deepening color, and cutting haze. It reduces light by a fixed 1.5–2 stops as a side effect.
An ND filter simply reduces light across the board without any selective filtering — its purpose is purely to allow longer shutter speeds or wider apertures in bright conditions.
They can be used together — stacking a CPL on top of an ND filter is a common landscape photography setup for situations where you want both glare control and a long exposure. Be aware that stacking increases vignetting risk, especially on wider lenses.
For a detailed guide on using ND filters for waterfalls, seascapes, and long exposure work, see our article on ND filters for long exposure photography.
Caring for Your CPL
CPL filters are more complex than simple glass filters — the rotating element means there are moving parts and a small gap where dust can enter between the rings over time. Clean the front and rear glass surfaces with a microfiber cloth and lens cleaning solution. Never use paper towels or clothing — they scratch coatings.
Store the filter in its original case or a protective pouch when not in use. Avoid leaving CPLs loose in a camera bag where they can knock against other gear and scratch the glass or coating.
Check the rotation mechanism occasionally — it should move smoothly and with consistent resistance. A filter that rotates too freely can slip out of its optimal position during a shoot without you noticing.
Further Reading
For a technical deep-dive into polarized light and the physics behind how CPL filters work, the Physics Classroom’s explanation of polarization is one of the clearest available. For practical field tests and brand comparisons, Photography Life’s CPL filter reviews are thorough and regularly updated.
If you’re building out your filter kit beyond a CPL, our guide to photography gear essentials covers what to prioritize at each stage of a photographer’s development.
Final Thoughts
A circular polarizer is one of the few pieces of camera gear that pays for itself immediately and visibly on the first shoot. The sky looks better. The water looks better. The foliage looks better. And none of it requires any post-processing work — it’s done at capture.
The key to getting the most from a CPL is understanding when it works and when it doesn’t. Pointed at a bright blue sky at 90 degrees to the sun, it’s transformative. Pointed toward the sunrise, it’s dead weight. Learn the light conditions that activate it, keep the angle relationship with the sun in mind, and rotate slowly rather than snapping to maximum effect. The images you get from a scene you already know how to shoot will improve noticeably — and that’s the best argument for any piece of gear.

Charles is a passionate photographer and visual storyteller with a keen eye for capturing authentic moments and timeless emotions. Through here, he combines creativity, technical expertise, and a love for natural storytelling to create images that preserve life’s most meaningful memories. His work focuses on genuine connections, beautiful details, and the unique stories behind every photograph.