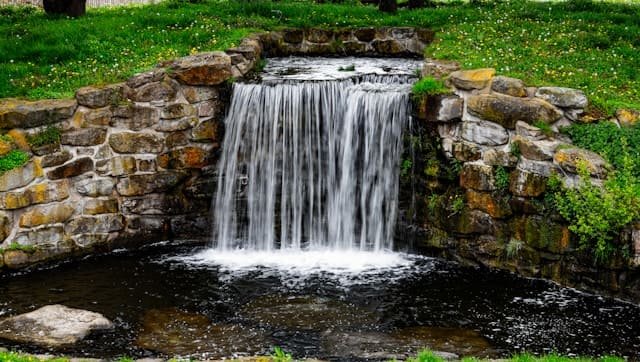
Long exposure photography turns the ordinary into something otherworldly. A rushing waterfall becomes a silken sheet of white. A busy street empties of people. Clouds stretch across the sky like brushstrokes. The tool that makes most of this possible in daylight is the neutral density filter — one of the most valuable pieces of glass a photographer can own.
This guide covers everything you need to know: what ND filters actually do, how to read their strength ratings, which type to choose for different situations, how to calculate your exposure, and how to avoid the common mistakes that ruin long exposure shots.
What Is an ND Filter and What Does It Actually Do?
A neutral density filter is a piece of optical glass or resin that attaches to the front of your lens and reduces the amount of light reaching the sensor — without changing the color of the scene. The “neutral” part is important: a well-made ND filter doesn’t introduce a warm or cool color cast, it simply makes the scene darker.
Why would you want a darker scene? Because exposure is a triangle of three variables — shutter speed, aperture, and ISO. When you reduce the light coming in, you have to compensate by changing one of those variables. In long exposure work, that variable is shutter speed. You slow it down — sometimes to 30 seconds, sometimes to several minutes — and anything that moves during that time blurs into a smooth, flowing streak.
Without an ND filter, achieving a 10-second exposure in bright daylight is impossible. Even at ISO 100 with the aperture stopped all the way down to f/22, your image would be completely overexposed. An ND filter solves this by acting like a dimmer switch for your lens.
Understanding ND Filter Stops: The Rating System Explained
ND filters are rated by how many stops of light they block. A “stop” in photography means halving or doubling the light. Each additional stop cuts the incoming light in half and requires you to double your shutter speed to compensate.
Here’s how the most common filter strengths translate to practical use:
| Filter Rating | Stops Blocked | Light Reduction | Shutter Speed Multiplier |
|---|---|---|---|
| ND2 | 1 stop | 50% | ×2 |
| ND4 | 2 stops | 75% | ×4 |
| ND8 | 3 stops | 87.5% | ×8 |
| ND64 | 6 stops | 98.4% | ×64 |
| ND1000 | 10 stops | 99.9% | ×1024 |
| ND32000 | 15 stops | 99.997% | ×32768 |
Practical example: If your correct exposure without a filter is 1/125s at f/8, ISO 100 — and you attach a 10-stop ND1000 filter — your new shutter speed becomes approximately 8 seconds (1/125 × 1024 ≈ 8 seconds).
The most important filters to own are the 6-stop (ND64) and 10-stop (ND1000). These two cover 90% of long exposure situations. The 6-stop is your everyday workhorse for overcast days and moderate effects. The 10-stop is your big gun for bright daylight and dramatic multi-second blurs.
Types of ND Filters
Solid (Fixed) ND Filters
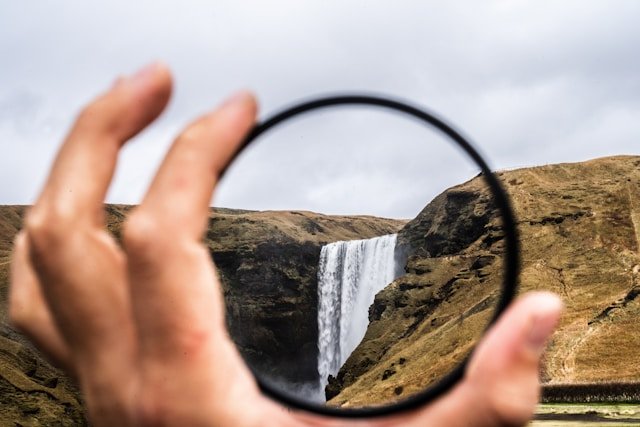
The most common type. The entire filter surface is uniformly dark — it reduces light evenly across the whole frame. This is what most photographers mean when they say “ND filter.” They come in specific fixed strengths (3-stop, 6-stop, 10-stop, etc.).
Best for: Long exposures where you want consistent darkness across the entire frame — waterfalls, seascapes, cityscapes, architecture.
What to look for in quality: Minimal color cast, no loss of sharpness at the edges, even density across the filter surface. Brands like B+W, Breakthrough Photography, Kase, and NiSi are well-regarded at the premium end. Lee Filters and Hoya offer good mid-range options.
Graduated ND Filters (GND)
A graduated ND filter is dark on one half and clear on the other, with a gradual transition in between. They’re designed for high-contrast landscape scenes where the sky is much brighter than the foreground — a common situation at sunrise and sunset.
By aligning the dark half of the filter with the sky and the clear half with the land, you can bring the sky exposure down by 2–3 stops without darkening the foreground. The result is a single well-exposed frame rather than a sky that’s blown out or a foreground that’s too dark.
Hard GND vs. Soft GND: A hard graduated filter has a sharp, defined transition line. Use this when your horizon is straight and unbroken — open seascapes, flat deserts. A soft graduated filter has a gradual, feathered transition, which is more forgiving when your horizon has trees, buildings, or hills breaking into the sky area.
Best for: Landscape photography at golden hour, seascapes, mountain vistas where the sky and ground need separate exposure treatment.
Variable ND Filters
Variable ND filters consist of two rotating polarizing elements stacked together. By rotating the front element, you can adjust the darkness from roughly 2 stops to 8 or 10 stops in a single filter. The appeal is obvious — one filter replaces several fixed ones.
The trade-offs are real, however. Variable NDs often introduce an “X pattern” of uneven darkening at maximum strength settings — a diagonal cross of darker areas visible in the frame, particularly at wide focal lengths. They can also introduce a slight color shift and reduce contrast at maximum settings.
Best for: Run-and-gun situations where you need to change exposure quickly, video work, or travel where carrying multiple fixed filters isn’t practical. For critical still photography, fixed filters produce better image quality.
Essential Gear for Long Exposure Photography
An ND filter alone won’t get you far. Long exposure photography requires a complete system:
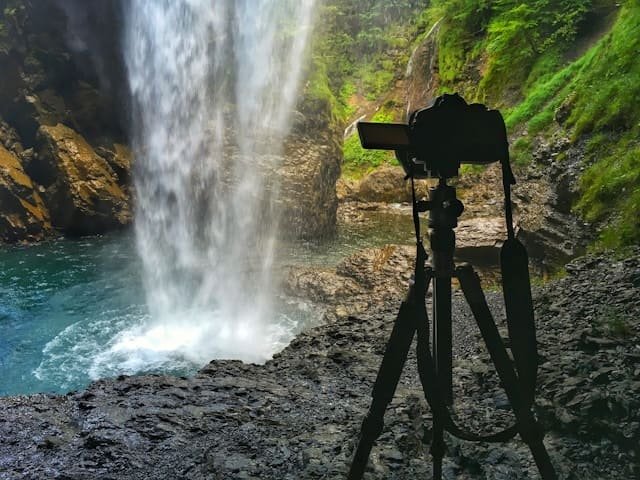
Tripod: Non-negotiable. Any camera movement during a multi-second exposure will ruin the shot. Invest in a tripod heavy and stable enough that it won’t shift in wind. Carbon fiber tripods are lighter for travel; aluminum is more affordable and damped.
Remote shutter release: Even pressing the camera’s shutter button introduces vibration. A wired or wireless remote release (or the camera’s built-in self-timer set to 2 seconds) eliminates this. For exposures longer than 30 seconds, you’ll need a remote with a locking mechanism for Bulb mode.
Lens cloth and filter cloth: Outdoor long exposure sessions — especially near water — inevitably lead to mist, spray, or condensation on your filter. Keep a microfiber cloth accessible.
ND filter exposure calculator app: Apps like “ND Timer” or “Long Exposure Calculator” take the math out of calculating compensated shutter speeds. Worth downloading before your first outing.
Step-by-Step: How to Shoot Long Exposures With an ND Filter
Step 1: Compose and focus before the filter goes on
Set up your composition carefully. Autofocus on your subject while you can still see clearly through the viewfinder or live view. Once you’ve confirmed focus, switch your lens to manual focus — this prevents the camera from hunting for focus in the dark scene created by the filter.
Step 2: Determine your base exposure
Without the ND filter attached, meter the scene normally. Use aperture priority mode or manual mode to find a balanced exposure. Note the shutter speed, aperture, and ISO. Keep ISO at 100 (or your camera’s native base ISO) to minimize noise.
Step 3: Calculate your new shutter speed
Using the stop conversion table above (or a calculator app), work out your compensated shutter speed. Round to the nearest full second for simplicity. For exposures longer than 30 seconds, you’ll need Bulb mode.
Step 4: Switch to Manual mode
Dial in your calculated shutter speed, keep the same aperture and ISO from your base exposure. Do not change these after attaching the filter.
Step 5: Disable image stabilization
When your camera is on a tripod, turn off lens-based optical stabilization (OIS/VR/IS). Stabilization systems are designed for handheld shooting and can actually introduce micro-vibrations when the camera is already perfectly still.
Step 6: Attach the ND filter
Carefully screw on or slot in your filter. If you’re using a square filter system, make sure the holder is locked securely.
Step 7: Trigger the shutter remotely
Use your remote release or the 2-second self-timer. Do not touch the camera during the exposure. If it’s windy, consider shielding the tripod legs from gusts with your body or a bag.
Step 8: Review and refine
Check the histogram — not just the LCD preview — to assess exposure accuracy. A good histogram for a long exposure landscape typically shows data spread across the full range without clipping at either end. Adjust shutter speed if needed and reshoot.
ND Filter Strength Guide: Which to Use When
| Scene | Condition | Recommended Filter |
|---|---|---|
| Waterfall, mild blur | Overcast day | 3–6 stop (ND8–ND64) |
| Waterfall, silky smooth | Bright daylight | 10 stop (ND1000) |
| Seascape, misty water | Overcast | 6 stop (ND64) |
| Seascape, glass-smooth | Bright sun | 10 stop (ND1000) |
| Clouds in motion | Any | 6–10 stop |
| Removing crowds/people | Bright daylight | 10 stop (ND1000) |
| Ultra-long exposures (minutes) | Any | 15 stop (ND32000) |
| Wider aperture for shallow DoF | Bright day | 3–6 stop |
Troubleshooting Common Long Exposure Problems
Color cast in the image: Almost always caused by a lower-quality ND filter. Correct in post using white balance adjustment (a custom white balance set with the filter attached can prevent this at capture). Premium filters from brands like Breakthrough Photography or B+W MRC are engineered to minimize color shifts.
X-pattern darkening: Specific to variable ND filters pushed to maximum strength. Solution: don’t push the filter to its limits. Stay 1–2 stops below maximum, or switch to fixed filters for critical work.
Blurry or soft image despite a tripod: Check that image stabilization is turned off. Verify your tripod is on stable ground — even soft sand can flex during a long exposure. Make sure the filter is seated flush and not causing vibration from wind catching it.
Dark corners or vignetting: Common when stacking multiple filters or using a wide angle lens. Solution: use a single filter of sufficient strength rather than stacking two, or use a slim-profile filter ring.
Image too bright or too dark: Recheck your stop calculation. One common mistake is forgetting to account for the full multiplier — a 10-stop filter multiplies shutter speed by 1,024, not 10.
Post-Processing Long Exposure Images
Long exposures often benefit from targeted adjustments in editing software:
White balance: If your ND filter introduced any color cast, correct it first before any other adjustments. Set white balance manually by clicking on a neutral grey area (pavement, rocks, overcast sky).
Noise reduction: Long exposures can produce luminance noise and hot pixels, especially in shadow areas. Apply luminance noise reduction in Lightroom or Camera Raw before sharpening. Many cameras also offer “Long Exposure Noise Reduction” in settings — this takes a second “dark frame” exposure of the same length with the shutter closed, then subtracts the sensor noise. Useful but it doubles your time on location.
Contrast and clarity: Long exposures tend to produce a slightly flat, low-contrast result. A gentle boost to contrast and a selective clarity increase on textured areas (rocks, trees) can restore dimension without making the image look over-processed.
Graduated filter or masking in Lightroom: Use Lightroom’s masking tools to apply separate adjustments to the sky and foreground — particularly useful if you weren’t using a physical GND filter at capture.
Creative Long Exposure Subjects to Try
Waterfalls and rivers: The most popular long exposure subject for good reason. Even a modest 2–3 second exposure transforms turbulent water into a smooth, dreamlike flow. Use a 6-stop filter on overcast days, 10-stop in bright conditions.
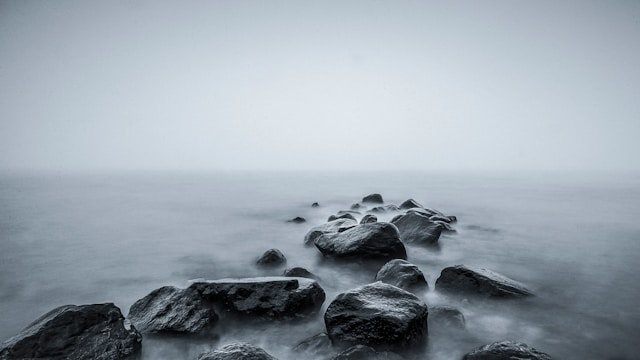
Seascapes: Ocean waves become a ghostly, fog-like mist with exposures of 15–30 seconds. Rock formations gain a surreal quality surrounded by smoothed water. Early morning and golden hour provide the best light quality combined with manageable brightness for filter use.
Cloud movement: On a windy day, a 60–120 second exposure with a 10-stop filter turns cumulus clouds into sweeping directional streaks that give landscape images a dramatic, almost cinematic quality.
Cityscapes at night: Light trails from car headlights and taillights require exposures of 10–30 seconds. No ND filter is usually needed at night — the darkness itself provides the long exposure opportunity. For dusk blue-hour shooting where there’s still ambient sky light, a 3–6 stop filter can help.
Removing people from busy scenes: With a 10-stop filter and a 2–4 minute exposure, anyone moving through the frame will disappear entirely — leaving you with a clean architectural shot of a plaza or landmark that would otherwise be full of tourists.
Recommended Reading and Resources
For a deeper dive into the technical side of ND filter ratings and optical quality comparisons, the team at Photography Life has tested and rated dozens of filter brands side by side. Their filter comparison guides are among the most thorough available.
For the creative side of long exposure work — composition, subject selection, and artistic approach — the work of photographers like Hans Strand demonstrates what’s possible with patience and a good ND filter stack.
If you’re interested in how ND filter work fits into a broader understanding of outdoor photography gear, our guide to photography essentials at Haiku Photography Blueprint covers the lenses, cameras, and accessories that complement long exposure work best.
For related filter techniques that work alongside ND filters outdoors, see our article on how circular polarizers improve photos — the two filter types pair extremely well for landscape shooting.
Final Thoughts
ND filters are one of those rare pieces of photography gear where the investment directly and immediately improves your creative output. There’s no technique to perfect before results come — attach the filter, slow the shutter, and the image looks different. Better, usually. The challenge comes in refining your exposures, choosing the right strength for conditions, and learning to visualize how motion in the scene will render over time.
Start with a quality 6-stop and 10-stop fixed ND filter from a reputable brand. Learn those two filters thoroughly before expanding. The photographers who get the most from long exposure work aren’t necessarily the ones with the biggest filter collection — they’re the ones who understand the light they’re working with and know exactly how to use what they have.

Charles is a passionate photographer and visual storyteller with a keen eye for capturing authentic moments and timeless emotions. Through here, he combines creativity, technical expertise, and a love for natural storytelling to create images that preserve life’s most meaningful memories. His work focuses on genuine connections, beautiful details, and the unique stories behind every photograph.