Real estate photography is one of the most consistently bookable commercial photography niches available — and one of the most technically specific. Every property listed for sale or rent needs photography. Every estate agent who understands digital marketing knows that listing images are the first and most important filter a buyer applies before deciding to view a property. The demand is structural and permanent, it is entirely local, and it scales predictably with your volume and efficiency.
It is also a genre with a distinct and learnable technical toolkit — wide-angle perspective correction, window exposure balancing, HDR blending, flash techniques for dark interiors, twilight shooting, drone aerial photography — that separates genuinely professional real estate photography from the phone snaps that still dominate the lower end of most property markets.
This guide covers the complete picture: the gear, the shooting techniques, the editing workflow, drone add-ons, what to charge, and how to build a sustainable local real estate photography client base.
Why Real Estate Photography Matters
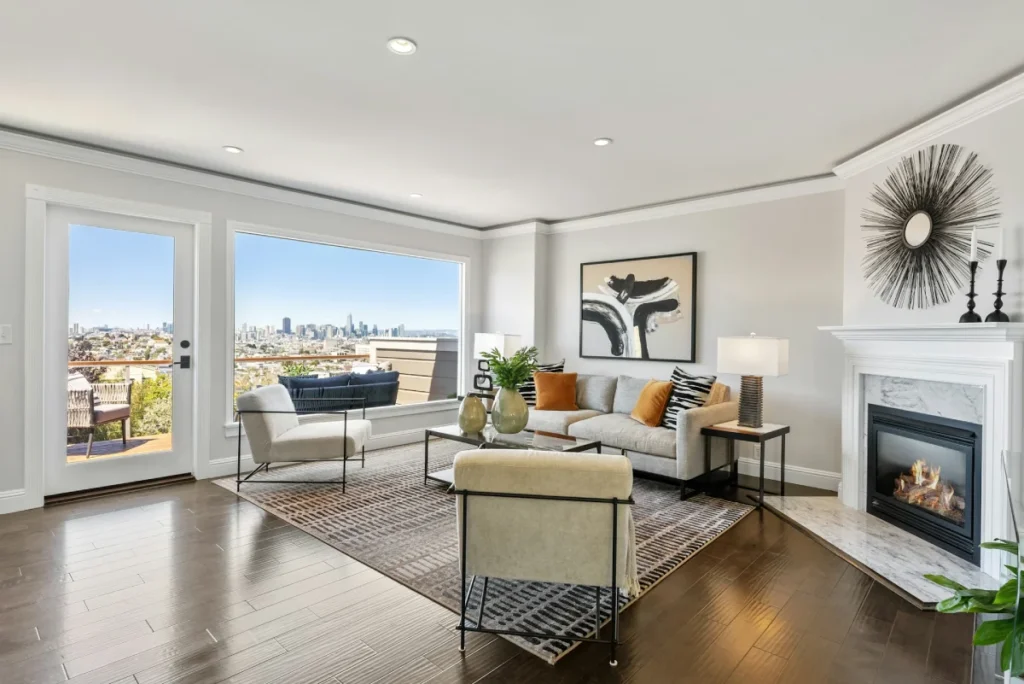
The commercial case for professional real estate photography is well established. Properties with professional photography sell faster and for more money than equivalent properties with amateur or phone photography — a finding consistent across multiple property market studies.
The mechanism is straightforward: in a market where buyers make initial decisions based on online listing images, photography quality functions as a proxy for property quality. A poorly photographed property that shows dark rooms, converging vertical lines, blown-out windows, and cluttered countertops creates a negative first impression that no subsequent information easily reverses. A well-photographed property that shows bright, proportionate rooms with accurate window exposure and clean presentation creates an immediate positive association.
For estate agents, this means their listings perform better — more views, more enquiries, faster sales — when photographed professionally. For photographers, it means there is a clear and quantifiable value proposition to offer that goes beyond aesthetic preference.
Real Estate Photography Equipment
Camera Body
Full-frame mirrorless or DSLR cameras are preferred for real estate photography for their superior dynamic range — critical for the high-contrast interior-with-window situations that define the genre. The sensor’s ability to simultaneously hold detail in a bright window and a darker room interior determines how much work the exposure blending workflow needs to do.
Recommended bodies: Sony A7 IV, Canon R6 Mark II, Nikon Z6 III. APS-C cameras (Sony A6700, Fujifilm X-T5) are workable, particularly for photographers starting out, but the dynamic range advantage of full-frame becomes most apparent in challenging lighting situations.
Resolution requirement: A minimum of 24 megapixels. Real estate images are frequently cropped — to produce portrait-orientation feature images from landscape originals, or to tighten composition slightly after the fact — and higher resolution provides more flexibility.
Tethering capability: For commercial shoots with builders, developers, or clients reviewing images during the shoot, tethering via USB to a laptop running Lightroom is worth configuring.
Lenses
Wide-angle zoom (16–35mm full frame / 10–22mm APS-C): The primary lens for most real estate shooting. This range covers the majority of rooms from standard shooting positions. For very small rooms — a compact bathroom or a study — going as wide as 14–16mm may be necessary.
Critical caveat on wide angle: The widest focal lengths (below 16mm full frame) introduce significant barrel distortion and perspective exaggeration — rooms appear unnaturally elongated, furniture looks warped, and proportions are inaccurate. Buyers who view properties after seeing wide-angle photography frequently report disappointment when the actual rooms are smaller than they appeared. Use the widest focal lengths deliberately and selectively, and correct lens distortion in post-processing.
Tilt-shift lens (24mm TS-E / PC-E): The professional standard for architectural and high-end real estate photography — allows vertical lines to be kept perfectly straight without camera tilt correction. At several thousand dollars, this is a specialist investment for photographers pursuing architectural commissions. For standard residential real estate, vertical correction in Lightroom produces adequate results.
Standard zoom (24-70mm): Useful for detail shots — kitchen fittings, bathroom fixtures, feature items — that benefit from slightly longer perspective rather than the wide-angle exaggeration of the primary lens.
Tripod
Non-negotiable for real estate photography. The multiple-exposure techniques required for window blending and HDR require identical framing across all exposures — handheld shots drift between exposures enough to make alignment unreliable. A sturdy ball-head tripod (Manfrotto, Really Right Stuff, or equivalent) with a levelling base or built-in bubble level maintains consistent horizontal framing throughout a shoot.
Camera height for interiors: The convention in real estate photography is to shoot at approximately 5 feet (150cm) from the floor — slightly below standard eye level. This height provides a natural perspective that shows floor and ceiling in appropriate proportion without the upward converging lines that result from shooting too low or the downward look that results from shooting too high.
Lighting Equipment
Flash for interior fills: Many real estate photographers use off-camera flash — positioned to mimic natural light direction — to fill dark areas of rooms without the artificial look of direct on-camera flash. A portable strobe (Godox AD200 Pro or similar) with a small softbox produces soft, directional fill that complements window light rather than fighting it.
The “flambient” technique: A widely used combination of flash and ambient exposures — shoot the room in ambient light (metered for the interior), then shoot with flash (providing even interior fill), then blend the two in post to get a naturally-lit-looking interior without the HDR look. This is the most commonly used professional technique for balanced interior photography.
LED panels: Portable, battery-powered LED panels (Aputure, Godox) serve as continuous fill lights — useful for small dark areas (under-cabinet kitchen lighting, poorly lit corridors) where a large strobe would be impractical to position.
Bounce flash: For quick shoots where setup time is limited, bouncing an on-camera speedlight off a white ceiling produces a reasonably even, shadowless fill that significantly improves on ambient-only shooting in dark rooms.
Additional Essential Gear
Bubble level: Both a hotshoe-mounted bubble level for checking horizontal camera alignment and the camera’s built-in electronic horizon level. Tilted rooms are one of the most immediately noticeable quality failures in real estate photography.
Remote shutter release: Eliminates the vibration from pressing the shutter button, particularly important during long ambient exposures.
Spare batteries: Real estate shoots involve high frame counts across multiple rooms and multiple exposures per position. Carry two fully charged spare batteries minimum.
Microfibre cloths: For quickly cleaning mirrors, glass surfaces, and chrome fixtures — all of which show fingerprints and smears under camera flash that are invisible to the naked eye.
How to Shoot Real Estate Photography: Room by Room
Preparation Before You Arrive
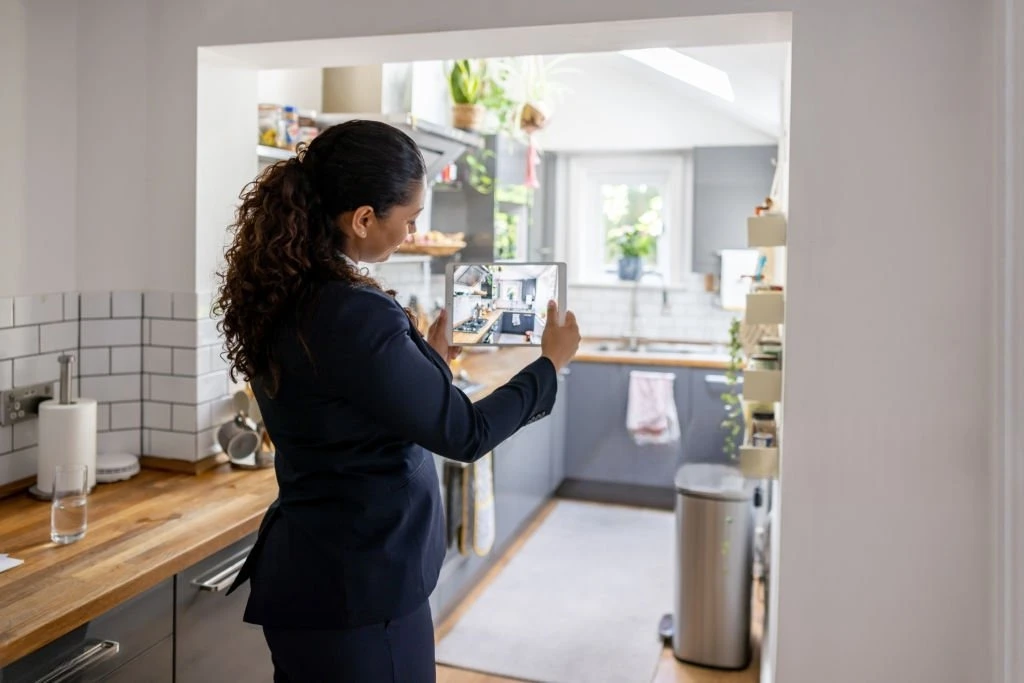
The most important factor in real estate photography quality is not shooting technique — it is the condition of the property at the time of the shoot. Cluttered rooms cannot be saved in post. Unwashed dishes, unmade beds, and personal items left on every surface make images look amateur regardless of how technically excellent the exposure and composition are.
Before every shoot, send the agent or homeowner a preparation checklist:
- All personal items removed from visible surfaces (kitchen counters, bathroom ledges, bedroom tables)
- All beds made neatly with fresh, unwrinkled covers
- All internal lights on (including under-cabinet kitchen lights, lamps, and pendant lights)
- All external lights off (garden lights that appear during daytime shoots look unnatural)
- All toilet seats down
- All bins out of sight
- Curtains and blinds open to maximum position
- Cars moved from the driveway
- Garden tidy and lawn mown if exterior shots are included
This checklist saves significant post-processing time and produces meaningfully better images.
Exterior Shots
Exterior photography is typically the first shot in a real estate sequence — it is the “hero image” that appears as the primary listing thumbnail and receives the most views.
Optimal timing: The best exterior light for most properties is when the sun is positioned broadly behind or to the side of the photographer — illuminating the facade directly. North-facing properties in the northern hemisphere are chronically difficult for this reason (the sun is always to the south, often putting the facade in shadow). Scout the property’s orientation before booking the shoot time and schedule accordingly.
Composition: Stand at the widest angle that shows the full property with clear sky above and full driveway below. Slightly off-centre compositions (shooting from one side of the driveway rather than dead centre) often produce more interesting images than fully symmetrical front-on shots. Include enough foreground to show the garden or driveway while keeping the property filling approximately two-thirds of the frame.
Kerb appeal staging: Check the frame carefully for bins, garden hoses, extension cables, and vehicles before shooting. A few minutes of frame preparation saves significant Photoshop time afterward.
Interior Rooms: The Standard Shooting Approach
Set up the tripod at the optimal position. For most rooms, this is from one of the two far corners, shooting toward the opposite corner — the diagonal view that shows the maximum depth and dimension of the space. In kitchens and bathrooms where straight-on compositions show the fitted elements more clearly, a centred position shooting straight at the primary feature wall is often better.
Level the camera precisely. Any tilt in the horizontal plane causes vertical elements (door frames, window frames, walls) to converge or diverge in ways that read immediately as amateurish. Use the camera’s electronic level and the tripod’s ball head to achieve precise horizontal alignment before every shot.
Set aperture at f/7.1–f/11. This range provides sufficient depth of field to keep all room elements from front to back in sharp focus (the entire room depth is within the depth of field at these apertures from most shooting distances) while avoiding the diffraction softening that occurs at f/16 and beyond.
Use ISO 100–400. Lower ISO for ambient exposures; higher ISO may be necessary in very dark rooms where even long exposures at f/8 produce underexposed images.
The Window Challenge: Exposure Techniques
The defining technical challenge of interior real estate photography is the extreme dynamic range between room interiors and the outside view through windows. In a typical room, the outside view through a window may be six to eight stops brighter than the room interior. No single exposure can capture both simultaneously without either overexposing the window or underexposing the interior.
Three approaches, in order of quality:
1. Window pull technique (advanced): Shoot the room metered for the interior (windows completely blown out). Then, without moving the camera, shoot the windows metered for the exterior view (interior completely dark). Blend the two exposures in Photoshop using a luminosity mask that replaces the blown window with the correctly exposed exterior view. This produces the cleanest, most natural-looking result — the exterior view through the window is accurate and properly exposed, and the interior is bright and detailed.
2. Flambient technique: Shoot ambient exposure (interior metered, windows blown). Shoot a flash-lit exposure at the same settings (the flash fills the interior evenly at the correct exposure level, the windows remain blown). In Lightroom or Photoshop, use the flash exposure as the base and mask in the window areas from the ambient exposure. The flash-lit interior looks more even and commercial than pure ambient; the windows show detail from the ambient layer.
3. HDR blending: Shoot three to five exposures in one-stop increments (from underexposed to overexposed), then merge in Lightroom (Photo → Merge to HDR) or Photomatix. The resulting merged file has extended dynamic range covering both interior and window. HDR blending is faster than the manual masking techniques but can produce an artificial, over-processed look if not applied conservatively. Use Lightroom’s HDR merge with minimal ghost reduction for the most natural results.
For most residential real estate photography at standard price points, the flambient technique provides the best balance of quality and time efficiency. Window pull masking produces the cleanest results for premium properties and architectural commissions.
Kitchen Photography
Kitchens are the most important room in most residential property listings — buyers consistently rank kitchens as the highest-priority room in their viewing decisions. Photograph from multiple positions:
Straight-on: Camera centred, shooting directly at the primary fitted wall (kitchen units and worktops). This shows the kitchen design clearly and works well for galley and single-wall kitchens.
Diagonal: From the far corner, showing the depth of the kitchen with an island or breakfast bar in the foreground and the fitted units behind. Best for open-plan kitchen-diners where showing the space is as important as showing the fittings.
Detail shots: Close-ups of specific features — quality appliances, stone worktops, specialist fittings — that represent the kitchen’s value. These contextual images appear later in the listing gallery.
Bathroom Photography
Bathrooms are compact and challenging — every reflective surface (mirrors, chrome taps, glass shower screens) creates potential for visible flash reflections and camera reflections.
Camera reflection management: Position the camera so the lens is not directly reflected in the primary mirror. Often shooting from one side at a slight angle eliminates the reflection while still showing the full bathroom.
Flash reflection management: Off-camera flash positioned outside the bathroom doorway or behind a diffusion panel reduces specular reflections on chrome and glass significantly compared to on-camera or in-room flash.
Always shoot the toilet: Include the toilet in the frame — agents who request bathroom images that inexplicably exclude the toilet create confusion about the bathroom’s completeness. Ensure the seat is down.
Bedroom Photography
Beds are the visual centrepiece of bedroom photography. A well-made bed with fresh, ironed covers significantly elevates the quality of bedroom images — and a wrinkled, poorly made bed in a premium property creates an incongruity that undermines the overall listing quality.
Shoot from the doorway or the corner opposite the bed head. Both positions show the bed as the primary subject while revealing the room’s dimensions and any window or wardrobe features.
Window management: Bedrooms with good natural light through well-positioned windows are a genuine selling point. Show the window in the background with appropriate exposure — use the window pull or flambient technique if the window is bright against a darker room.
Living and Reception Rooms
Shoot from multiple positions to show the full extent of the space — buyers want to assess whether their furniture will fit, so showing depth and dimensions accurately is important.
Furniture arrangement: If the room looks cramped or cluttered in the camera’s wide-angle view, suggest moving pieces that block sightlines or make the space look smaller. A sofa pushed slightly back from its normal position can open a significant foreground space that makes the room read as larger.
Fireplaces and feature walls: Shoot compositions that include the fireplace or primary feature wall as a clear element — these are selling points that should be visible rather than cropped out or obscured by furniture.
Drone Photography for Real Estate
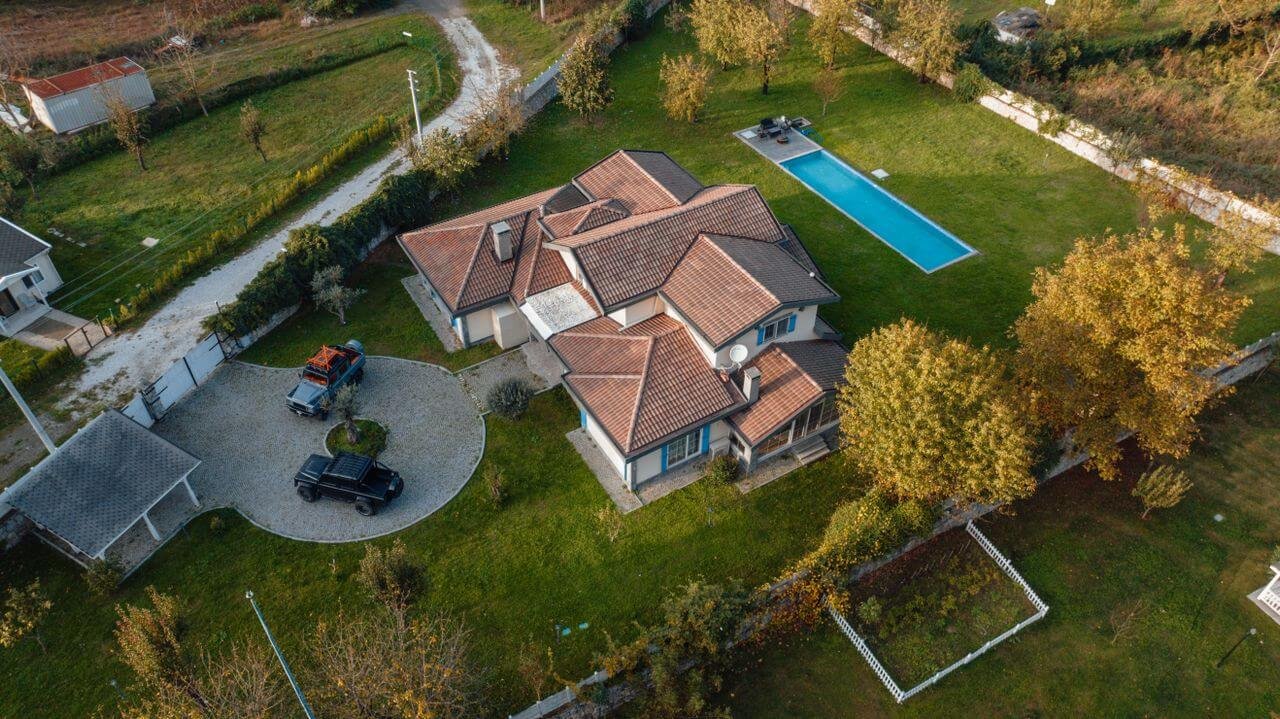
Drone photography has become an increasingly requested add-on for residential real estate and a standard requirement for commercial property, agricultural land, new development sites, and luxury residential listings.
Legal Requirements
In most countries, commercial drone operation requires a licence or certification. In the UK, the CAA requires a Flyer ID and Operator ID at minimum for recreational drones, and a General Visual Line of Sight Certificate (GVC) for commercial operations. In the US, the FAA requires a Part 107 Remote Pilot Certificate for commercial drone operations. In Australia, CASA requires a ReOC (Remote Operator Certificate) and RemPIC (Remote Pilot Licence) for commercial drone work.
Shooting real estate drone footage commercially without the appropriate licence and insurance is both illegal and professionally risky — a single regulatory violation can result in fines and the prohibition of future commercial drone work. Research the requirements in your specific jurisdiction before adding drone services to your offering.
Insurance: Public liability insurance that covers drone operations is essential and is a separate product from standard photographer’s insurance. Specialist photography and drone insurance providers (Hiscox, Balens, Ripe Insurance in the UK; Global Aerospace, BWI in the US) offer appropriate coverage.
Drone Equipment for Real Estate
The DJI Mini 4 Pro and DJI Air 3 represent the accessible professional standard — both produce 4K video and high-resolution stills, both are compact and portable, and both offer excellent obstacle avoidance for navigating around trees and structures. The DJI Mavic 3 Pro is the professional upgrade with a triple-camera system (including a 7x optical zoom telephoto camera that is exceptionally useful for architectural detail shots from distance).
For aerial still photography, a 12–48 megapixel sensor at 100–400 ISO in the early morning (soft light, minimal wind) or at blue hour (dramatic cityscape and landscape backgrounds for luxury properties) produces the strongest results.
What Drone Photography Adds to a Listing
Property in context: Aerial images show the property’s position relative to local amenities, transport links, green space, and neighbourhood character — information that ground-level photography cannot convey.
Plot and land extent: For properties with significant gardens, agricultural land, or development potential, drone photography is the only practical way to show the full extent of the outdoor space in a single image.
Architectural overview: For new builds and distinctive architecturally designed homes, a top-down or three-quarter aerial view shows the building’s design intent more completely than any ground-level composition.
Neighbourhood context for luxury listings: A twilight aerial showing the property illuminated against a darkening landscape or cityscape background has become a staple of luxury property marketing — a distinctive and visually impactful image that standard interior photography cannot replace.
Real Estate Photography Editing Workflow
A systematic, efficient editing workflow is essential in real estate photography because the volume of images per shoot (typically 25–50 edited images from a standard residential property) and the number of shoots per week (4–6 for a full-time real estate photographer) creates significant post-processing demands.
Step 1: Import and Cull
Import all RAW files to Lightroom. Cull quickly on first pass — reject any frames with obvious technical failures (severe motion blur, critical vertical tilt, exposure well outside usable range). For properties shot with bracketed exposures, select the exposure set for each composition before culling individual exposures within each set.
Step 2: Develop a Base Preset
Create or use a real estate photography preset that applies your standard starting corrections: lens distortion removal, a slight vertical correction offset, your standard white balance bias (real estate photography typically benefits from a slightly warm white balance that makes interiors feel inviting), and your standard exposure and contrast baseline.
Apply this preset to all selects in a single operation. This gives every image a consistent starting point from which individual corrections are made.
Step 3: Vertical Correction
Apply vertical perspective correction to every interior shot. In Lightroom’s Transform panel, use the Vertical slider to bring converging wall lines parallel. The Guided Upright tool (draw lines along the vertical elements you want to be straight) produces the most precise results for images with complex geometry.
Important: Vertical correction changes the aspect ratio and crops the image. Check after correction that the composition still works — you may need to apply a slight crop to remove the black triangles at the corners that vertical correction introduces.
Step 4: Exposure Balancing and Window Treatment
For images shot with the bracketed or flambient approach, blend exposures in Lightroom (using HDR merge) or Photoshop (using manual layer masking). For ambient-only shots, pull back highlights aggressively (Highlights slider to -70 to -100) while lifting shadows (Shadows slider to +40 to +60) to reduce dynamic range compression without the full HDR workflow.
Step 5: Colour Correction
White balance is the most critical colour correction in real estate photography. Mixed light sources — window daylight plus tungsten interior lights plus LED kitchen lights — create colour casts that vary across the image. The Lightroom Calibration panel allows hue shifts to individual colour channels that can neutralise problematic colour casts more effectively than white balance adjustment alone.
Sky replacement: For exterior images shot under grey or overcast skies, Lightroom’s AI Sky Replacement tool (or Photoshop’s equivalent) can substitute a blue-sky with appropriate clouds. This is standard practice in real estate photography, provided the replacement sky is realistic rather than obviously artificial.
Step 6: Local Adjustments
Use Lightroom’s Masking tools to apply targeted corrections:
- Lighten dark corners or shadow areas using a Radial Filter or Brush
- Brighten windows slightly if they still appear too dark after global adjustments
- Reduce glare on reflective surfaces
- Correct colour casts in specific areas (tungsten kitchen lights that appear orange in one corner while the rest of the image is daylight-balanced)
Step 7: Export
Export at full resolution for delivery (JPEG, quality 85–90, sRGB colour space). Most estate agents and property portals accept JPEG and have specific maximum file size requirements — check with your primary clients and configure your export preset accordingly.
A consistent naming convention (PropertyAddress_RoomName_001.jpg) makes file management and delivery professional and organised.
How to Price Real Estate Photography
Pricing real estate photography should be based on your cost of doing business and local market rates — not guesswork or purely competitor comparison. Our complete guide to pricing photography services covers the full calculation framework; here are the real estate-specific benchmarks:
Standard Pricing Structure
Most real estate photographers price per shoot based on property type and size, with add-ons for premium services:
Standard residential property (up to 2,000 sq ft, 20–25 edited images): £150–£300 / $150–$350 depending on market
Larger residential property (2,000–4,000 sq ft, 25–35 images): £250–£450 / $250–$500
Luxury residential (4,000+ sq ft, 35–50+ images, premium editing): £450–£900 / $500–$1,000+
Commercial property (offices, retail, hospitality): £400–£1,500 / $500–$2,000 depending on scope
Add-ons (priced separately):
- Drone photography (aerial stills and/or video): £150–£300 / $150–$350 per property
- Twilight/dusk exterior photography: £75–£150 / $100–$200 per visit
- Floor plan creation: £50–£150 / $75–$200 depending on provider
- Virtual tour (Matterport 3D scan): £150–£400 / $200–$500 depending on property size
- Property video walkthrough: £200–£500 / $250–$600
Who Pays
Estate agents pay for real estate photography in most markets — it is part of their marketing fee structure for sellers. In some markets (particularly FSBO — for sale by owner — and high-value properties where owners are directly commissioning premium photography), the property owner pays.
Clarify payment responsibility at the point of booking. Late payment is common in the estate agent market — include clear payment terms (net 14 days is standard) and a late payment clause in your booking terms.
Building a Real Estate Photography Client Base
Targeting Estate Agents
The primary client for residential real estate photography is the estate agent or realtor. Approaching agents effectively:
Identify local agencies: Target independent and regional agencies first — national chains often have preferred supplier arrangements that are difficult to break into. Independent agents make their own supplier decisions and are more responsive to direct approaches.
Lead with your portfolio and your value proposition: Agents care about one thing: selling properties faster and for more money. Your pitch should lead with that commercial outcome, not with your camera equipment or your passion for photography. “Properties photographed professionally list for 10–15% more and sell 50% faster” is more compelling to an agent than “I use a Sony A7IV with a 16-35mm lens.”
Offer a free first shoot: Many photographers offer one complimentary shoot to a new agent contact — removing the financial risk from the agent’s first trial of your work. If the images are strong, the relationship typically follows.
Consistent follow-up: Estate agents receive multiple supplier approaches. A single email or call rarely converts. A structured follow-up sequence — initial approach, follow-up after one week, check-in after one month, quarterly touch — maintains presence until a need arises.
Volume and Relationships
Real estate photography income is fundamentally volume-based. A photographer charging £200 per property shooting three properties per day, five days a week is generating £3,000 per week — a significant income that scales with efficiency and agent relationships.
The most efficient real estate photographers develop a small number of high-volume agent relationships rather than many occasional clients. An agent selling 50 properties per month who uses you for all of them is more valuable than 50 agents who each use you occasionally. Invest in those high-volume relationships with reliable delivery, responsive communication, and consistent quality.
Turnaround Time
Fast turnaround is the single most important service quality factor for most estate agents — they want images available to upload to listings within 24 hours of a shoot. Agents who have to wait three days for images often switch photographers. Build your editing workflow to deliver same-day or next-day without sacrificing quality.
Is Real Estate Photography a Good Career?
Real estate photography is one of the most accessible commercial photography careers — consistent demand, clear value proposition, local market, and a learnable technical skill set make it more reliably buildable than many other photography niches.
The limitations are real: the per-shoot income is lower than other commercial photography specialties; the editing time per property is significant; the work is heavily volume-dependent; and the relationship with estate agents places you in a service-provider rather than creative-director role.
For photographers who want reliable, consistent income from photography without the variability of portrait bookings or the relationship complexity of wedding photography, real estate photography provides a strong commercial foundation — particularly when combined with drone add-ons, virtual tours, and commercial property work that increases per-booking revenue.
For more on whether a photography career is right for you across all its dimensions, our guide to photography as a profession covers the complete career decision framework. For the income streams real estate photography can fit into alongside other services, our guide to how to make money with photography covers the full picture.
Further Reading
For the circular polarizer technique that controls reflections on glass and windows in exterior architecture photography, our guide to circular polarizer filters covers the technique in depth. For the wide-angle lens selection most important for real estate photography, our photography lenses guide covers the focal length and aperture decisions relevant to interior shooting. For the drone photography legal framework and equipment selection, our types of photography guide covers aerial photography in the broader genre context.
For external reference on real estate photography standards and professional development, the Real Estate Photographers of America and International (REPAI) offers professional development resources, certification programmes, and a community of working real estate photographers. For HDR blending software specifically, Photomatix Pro remains the most widely used dedicated HDR processing tool in the real estate photography industry.
Final Thoughts
Real estate photography rewards those who treat it as a system rather than a series of individual creative decisions. The best real estate photographers are not necessarily the most creative photographers — they are the ones who have built reliable, efficient, high-quality systems for preparing clients, executing shoots consistently, processing images quickly, and delivering professionally on time.
The technical craft is learnable. The window blending technique becomes second nature with practice. The vertical correction workflow becomes automatic. The exterior timing judgment becomes instinctive. What builds a real estate photography business is not mastering the craft more deeply than competitors — it is deploying that craft reliably, efficiently, and in service of the commercial outcome your clients actually care about.

Charles is a passionate photographer and visual storyteller with a keen eye for capturing authentic moments and timeless emotions. Through here, he combines creativity, technical expertise, and a love for natural storytelling to create images that preserve life’s most meaningful memories. His work focuses on genuine connections, beautiful details, and the unique stories behind every photograph.