A technically perfect portrait — sharp focus, correct exposure, flattering light — can still be a completely forgettable photograph. And a technically imperfect portrait — slightly soft, a fraction underexposed — can be extraordinary if it captures something true about the person in it.
That tension sits at the heart of portrait photography. The technical skills matter enormously and will be covered in full here. But they serve a purpose that is fundamentally human: creating an image that makes a viewer feel they have genuinely encountered another person. The best portrait photographers are not primarily camera operators — they are students of people, able to create the conditions in which genuine expression emerges and skilled enough to recognise and capture it when it does.
This guide covers the complete craft: the technical foundation of portrait lighting and camera settings, the interpersonal craft of direction and connection, posing principles that produce natural results, the major portrait sub-genres and what each demands, and how to build a consistent portrait style over time.
What Makes a Portrait Work
Before the technical specifics, it is worth understanding what the strongest portrait photographs actually do — because that understanding should inform every technical decision that follows.
The portraits that endure — Yousuf Karsh’s Churchill, Dorothea Lange’s Migrant Mother, Richard Avedon’s American West series — share a quality that is easier to recognise than define. The subject feels genuinely present. Not performed, not arranged, but actually there, as a specific person with a specific interior life, caught in a moment of being themselves.
That quality is produced by the interaction between technical choices and interpersonal ones. The technical choices — focal length, aperture, light direction — create the physical conditions of the image. The interpersonal choices — how the photographer communicates, what they ask of the subject, how long they are willing to wait and work — create the psychological conditions in which genuine expression becomes possible.
Neither alone is sufficient. The technically brilliant portrait of someone performing for the camera is a technically brilliant record of a performance. The emotionally genuine portrait made in poor light with a wrong lens is still a portrait of someone performing — just performing less consciously, which is a start but not a destination.
The goal is both simultaneously: the technical precision that makes the image work visually, in the service of a moment of genuine human presence.
Camera Settings for Portrait Photography
Aperture: Controlling Depth of Field
The aperture choice in portrait photography determines both exposure and depth of field — how much of the image from front to back appears in sharp focus.
For most portrait work, photographers choose apertures between f/1.4 and f/5.6. The choice within that range depends on what you are prioritising:
f/1.4–f/2: Maximum background separation. At these apertures, the depth of field is extremely shallow — sometimes so shallow that if the subject moves slightly between focusing and firing, focus shifts from the eye to the ear or nose. Produces the most dramatic background blur but requires precise focus technique. Best for single-subject headshots where background context is unwanted.
f/2–f/2.8: A more practical wide aperture for most portrait shooting. Still produces beautiful background blur with more focusing forgiveness. The most common choice for professional portrait work.
f/2.8–f/4: Increases depth of field enough to keep both eyes sharp even at slight angles, and to keep multiple subjects in focus when shooting group portraits. Reduces background blur noticeably. Good for environmental portraits where some background context and sharpness is intentional.
f/5.6–f/8: Used when maximum depth of field is wanted — full-body portraits where both the face and clothing need to be sharp, group portraits of multiple people at different distances, or environmental portraits where the background setting is as important as the subject.
The relationship between aperture and background blur is also influenced by focal length and the distance between subject and background. A 135mm lens at f/4 produces far more background blur than a 35mm lens at f/4 with the same framing — because the telephoto compression compresses the relationship between foreground and background visually. For more on how focal length affects portrait rendering, our photography lenses guide covers this in detail.
Shutter Speed
For static portrait subjects, shutter speed is primarily an exposure variable — set it to achieve correct exposure alongside your chosen aperture and ISO. A common starting point is 1/125s, which handily freezes any slight subject movement without requiring a tripod.
For handheld portrait shooting, keep shutter speed at or above the reciprocal of your focal length (1/85s at 85mm, 1/135s at 135mm) to prevent camera shake from blurring the image.
For portraits with significant subject movement — children running, dancing subjects, action-oriented personal branding shoots — raise shutter speed to 1/500s or faster to freeze motion.
For creative motion blur — deliberately blurring a moving subject while keeping the environment sharp, or using a slow sync flash technique — shutter speeds of 1/30s to 1 second are used intentionally. These require a tripod and deliberate creative intent.
ISO
Keep ISO as low as the lighting conditions allow. For outdoor natural light portraits in good conditions, ISO 100–400 is achievable. For indoor available light without flash, ISO 800–3200 may be necessary. For dark venues or night portraits, ISO 6400 and above.
Modern full-frame cameras handle high ISO well — noise at ISO 3200 on a current Sony A7 or Canon R system is manageable in post. The primary impact of high ISO in portrait photography is in the shadow areas of skin — where noise is most visible and most distracting. For more on managing this, our guide to ISO and digital noise management covers both in-camera strategies and post-processing noise reduction.
Focus: Always on the Eyes
The eyes are the primary focal point of any portrait. A portrait with sharp clothing and soft eyes fails regardless of how well-executed everything else is. A portrait with soft clothing and sharp eyes often succeeds despite its technical imperfection.
Use single-point autofocus and position the focus point on the near eye — the eye closest to the camera. If the subject is at a slight angle to the camera, the near eye is the priority; the far eye will be slightly softer and that depth is usually flattering rather than distracting.
Modern mirrorless cameras with AI eye-detection — Sony Real-time Eye AF, Canon EOS iTR AF X, Nikon Eye Detection — track and hold focus on the subject’s eye through subject movement and reframing. For portrait photographers working in AF-C mode with moving subjects, enabling eye detection dramatically increases sharp-frame rate. Our guide to AF-S vs AF-C autofocus modes covers the configuration in detail.
Portrait Lighting: Natural Light and Studio
Natural Light Portraits
Natural light is the most accessible and often the most beautiful light source for portrait photography. Understanding how to find, modify, and use it is fundamental.
Window light: A large window provides one of the most flattering and controllable natural light sources available for portrait work. The window acts as a large, soft light source — size and diffusion that a portable flash cannot easily replicate without significant modifiers.
Classic window light portrait setup: position the subject so the window is at 45 degrees to their face, slightly above eye level. The light wraps around the near side of the face while the far side falls into a gentle shadow. This creates the sculpting that reveals facial structure without harsh contrast. Add a reflector (white card, foam core, or a commercial reflector) on the shadow side to bounce some fill light back if you want a softer shadow transition.
Control the quality of window light with the time of day and with diffusion. Direct sun through a window creates hard, directional light — beautiful for high-contrast dramatic portraits, more challenging for flattering everyday portraiture. Overcast sky through a window creates the softest, most even light available without studio equipment.
Outdoor natural light — the shade principle: Direct midday sun is the most difficult outdoor light for portraits — it creates harsh shadows under the eyes, nose, and chin and causes subjects to squint. The solution is shade: move the subject into open shade (under a tree canopy, in the shadow of a building, under an awning) where the light is softer and more even.
Open shade from a clear blue sky has a noticeably blue colour cast — the sky acting as the light source. Correct this with white balance (shift warm in camera or in post) or position the subject where shade is lit by a warm reflective surface (sand, a brick wall) rather than open blue sky.
Golden hour: The hour after sunrise and before sunset produces warm, low-angle, soft light that is flattering to almost every subject and every skin tone. The light quality during golden hour — directionality without harshness, warmth without orange-ness — is genuinely difficult to replicate artificially. For outdoor portrait sessions where you have control over timing, scheduling around golden hour is one of the single most impactful quality improvements available.
Overcast light: An overcast sky is a natural giant softbox — enormous, diffused, even. The resulting light is flattering, minimal-shadow, and consistent across the frame. The limitation is direction: it comes from above, which can create unflattering under-eye shadows. Position subjects in the open (not under tree cover) and have them tilt their chin slightly upward to catch the soft overhead light on the planes of their face.
Artificial and Studio Light for Portraits
Artificial lighting gives you complete control — over direction, quality, intensity, and colour — that natural light cannot provide. The trade-off is complexity, cost, and the time investment required to learn the system well.
For the complete breakdown of artificial light modifiers — softboxes, umbrellas, beauty dishes, strip boxes, reflectors — our guide to light modifiers for portraits covers every tool in practical depth with setup guidance. Here we focus on the fundamental lighting patterns.
The key lighting patterns:
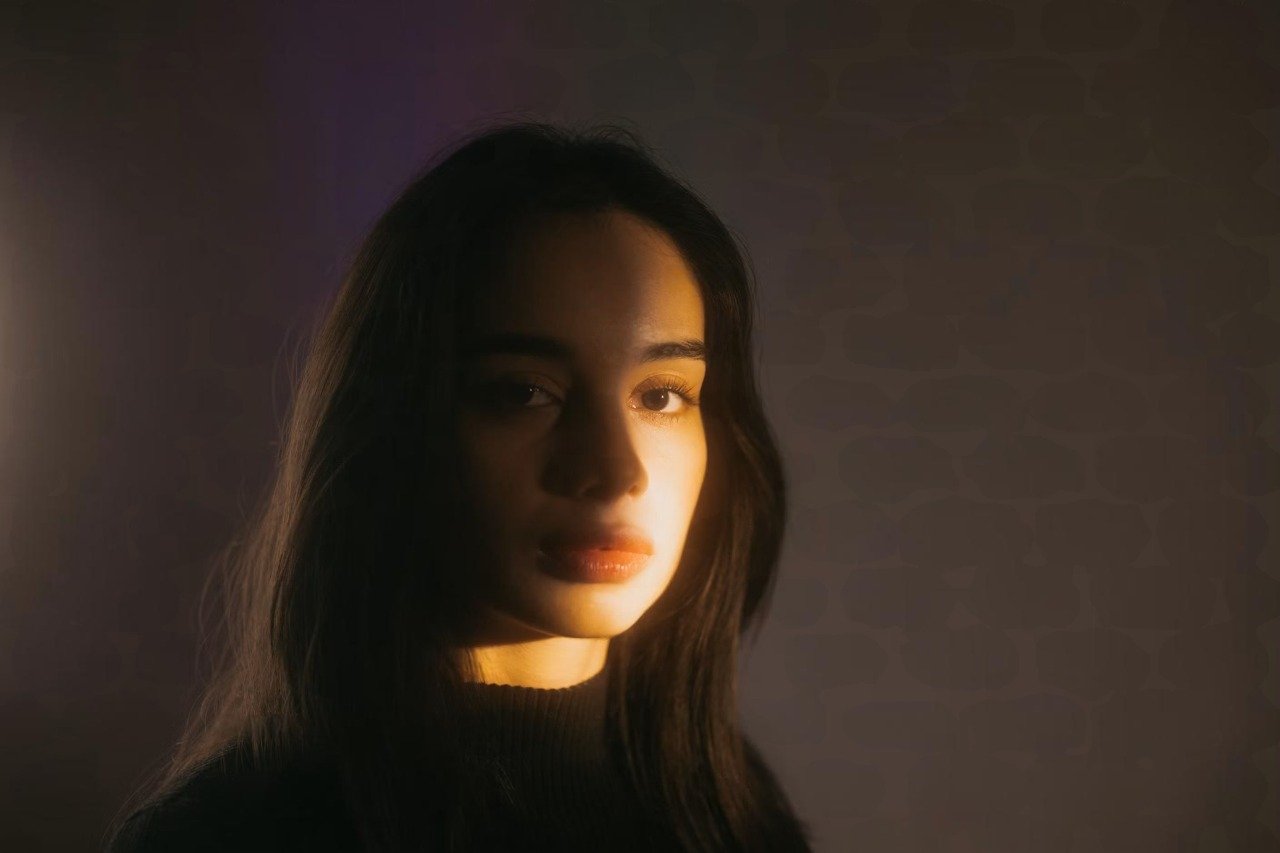
Rembrandt lighting: Key light positioned at 45 degrees to the subject and slightly above eye level. The characteristic “Rembrandt triangle” — a small, inverted triangle of light on the shadow-side cheek — identifies this pattern. Creates dramatic, dimensional, historically-resonant portraits. Strong for character portraiture and fine art portrait work.
Loop lighting: Similar to Rembrandt but with the key light at a slightly less extreme angle — the shadow under the nose creates a small loop pointing toward the corner of the mouth. One of the most universally flattering patterns — the slight shadow definition adds dimension without the drama of Rembrandt. The most common professional portrait lighting pattern.
Butterfly / Paramount lighting: Key light positioned directly in front of the subject and above eye level, aimed downward. Creates a butterfly-shaped shadow directly below the nose. Traditionally associated with glamour and beauty photography — the overhead angle produces flattering cheekbone definition. Add a reflector below the face to fill the under-chin shadow and reduce any unflattering under-eye darkness.
Split lighting: Key light directly to one side of the subject, at 90 degrees to the lens axis. Splits the face exactly in half — one side lit, one side in shadow. Very dramatic, high-contrast. Suited to character work, editorial, and fine art portraiture where drama is the goal. Generally too extreme for commercial portrait work.
Broad and short lighting: These terms describe which side of the face is lit (the broad side being the side facing the camera; the short side being turned away). Broad lighting (lighting the side of the face facing camera) emphasises width — generally avoided for faces the photographer wants to appear slimmer. Short lighting (lighting the far side of the face) is more commonly used for its slimming, sculpting quality.
Two-light and three-light setups:
Adding a fill light (lower power, opposite side from key) reduces shadow depth and produces a more commercial, less dramatic result. The ratio between key and fill power determines contrast — 2:1 (key twice as powerful as fill) produces gentle contrast; 4:1 produces significant shadow depth; 8:1 approaches split lighting quality.
A hair light or rim light — a light positioned behind and above the subject aimed toward the back of the head — adds a highlight along the hair and shoulder that separates the subject from the background. Essential in studio work where the background would otherwise blend tonally with dark hair.
A background light separately illuminates the backdrop, allowing independent control of background tone and any gradient or colour effect applied to it.
Posing Direction: Getting Natural Results
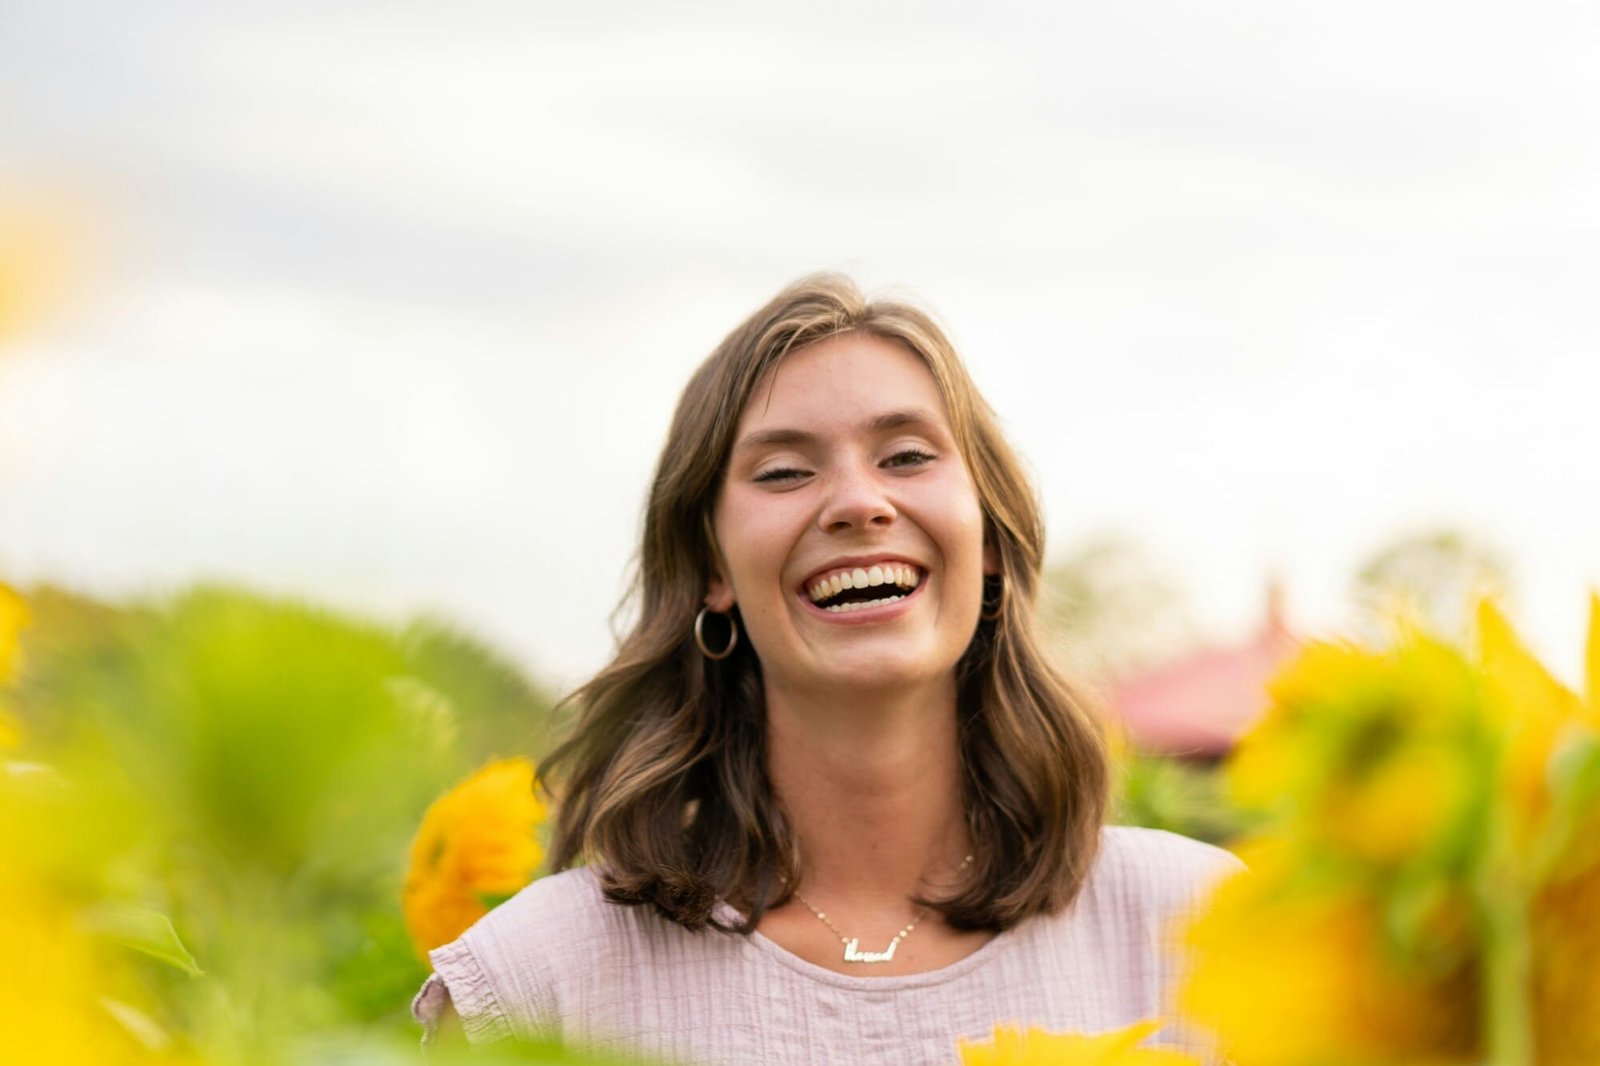
Posing direction is the interpersonal craft that determines whether a portrait subject looks natural and at ease or stiff and uncomfortable. The photographers who consistently produce natural-looking portraits are not those who have memorised the most poses — they are the ones who create an environment where natural expression is possible.
The Psychology of Being Photographed
Most people dislike being photographed. This is not vanity — it is a genuine discomfort with the self-consciousness that comes from sustained external attention. The standard portrait session dynamic — one person performing, one person watching and judging — is inherently uncomfortable for many subjects.
The most effective portrait photographers actively work against this dynamic. They reduce the psychological distance between photographer and subject through genuine conversation, through humour, through genuine interest in the person rather than in the image they are trying to make of them. The moment a subject forgets they are being photographed and becomes absorbed in a conversation or a task is often the moment the strongest images of the session are made.
Practical approaches:
Talk continuously. Dead air during a portrait session increases self-consciousness. Fill the space with conversation — not photography-related instructions, but genuine engagement with the person. Ask about their life, their work, what they are thinking about. The content of what they say is secondary; the effect of talking is that they are directed outward rather than inward.
Give them something to do. Activity-based direction (“walk slowly toward me,” “look out at the view and just take it in,” “lean against this wall and cross your arms”) is more effective than position-based direction (“stand with your right foot forward and turn your shoulders at 45 degrees”). Activity instructions produce natural body positions as a by-product of the activity; position instructions produce held, static positions that often look exactly like what they are.
Shoot between the directions. The moments immediately after a direction is completed — when the subject has just finished doing what you asked and has not yet received the next instruction — often produce the most natural frames of the session. The performed quality that comes with “okay, now hold it there” is replaced by a more relaxed, transitional state. Shoot continuously through the transitions.
Photograph the reaction as much as the performance. When something genuine happens — a real laugh, a moment of quiet reflection, an unguarded expression — it is usually fleeting. Continuous shooting through moments you sense might produce genuine expression rather than waiting for the perfect expression to arrive gives you more to work with in the edit.
Posing Principles That Produce Flattering Results
Beyond the psychological approach, a small number of physical posing principles consistently produce more flattering results:
The turned shoulder. Standing or sitting square-on to the camera emphasises width. Turning the body 30–45 degrees toward one side and keeping the face turned back toward camera produces a more flattering silhouette. The facing shoulder being further from camera also creates a visual narrowing effect.
Weight and stance. For standing portraits, having the subject shift their weight onto the back foot creates a slight hip tilt that produces more elegant posture. Feet together or weight evenly distributed produces a stance that reads as stiff. One foot slightly forward of the other adds naturalness.
The gap between arm and body. Arms pressed flat against the sides of the body appear wider. Creating even a small gap — a hand on a hip, an arm raised slightly away from the body — reduces this significantly. For seated subjects, having them turn slightly and place the near arm forward rather than flat against the body achieves the same effect.
Chin forward and slightly down. The most common self-conscious portrait posture involves the chin pulling back — which emphasises any fullness under the jaw. Asking subjects to bring the chin slightly forward and down reduces this effect. A useful instruction: “bring your ears forward slightly” achieves the same result without focusing attention on the chin or jaw area.
Hand awareness. Hands draw attention and are often the most awkward element in a portrait. Hands at rest in a natural position (not clenched, not splayed, not gripping the thigh awkwardly) or occupied in an activity are far more appealing than directed hand positions. When a specific hand placement is needed, show it to the subject rather than describing it — demonstration is clearer than instruction.
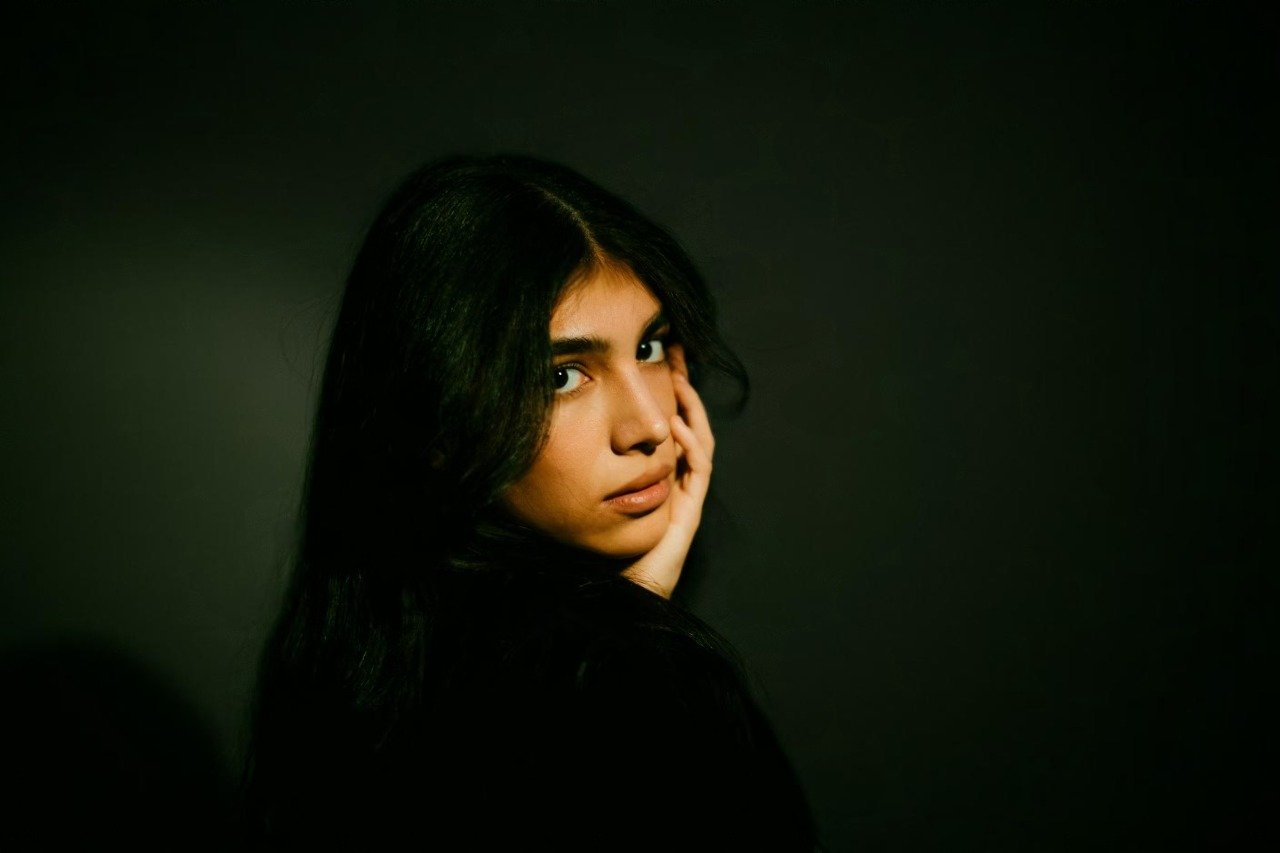
Eyes: Where the subject is looking dramatically changes the mood and register of the image. Direct eye contact produces engagement and confrontation — the subject is present with the viewer. Looking just off-axis (at a point just beside the lens) produces a similar quality without the directness. Looking away — at a horizon, at the sky, at something in the environment — produces a contemplative, private quality. Choose deliberately based on the portrait’s intent.
Portrait Sub-Genres: What Each Demands
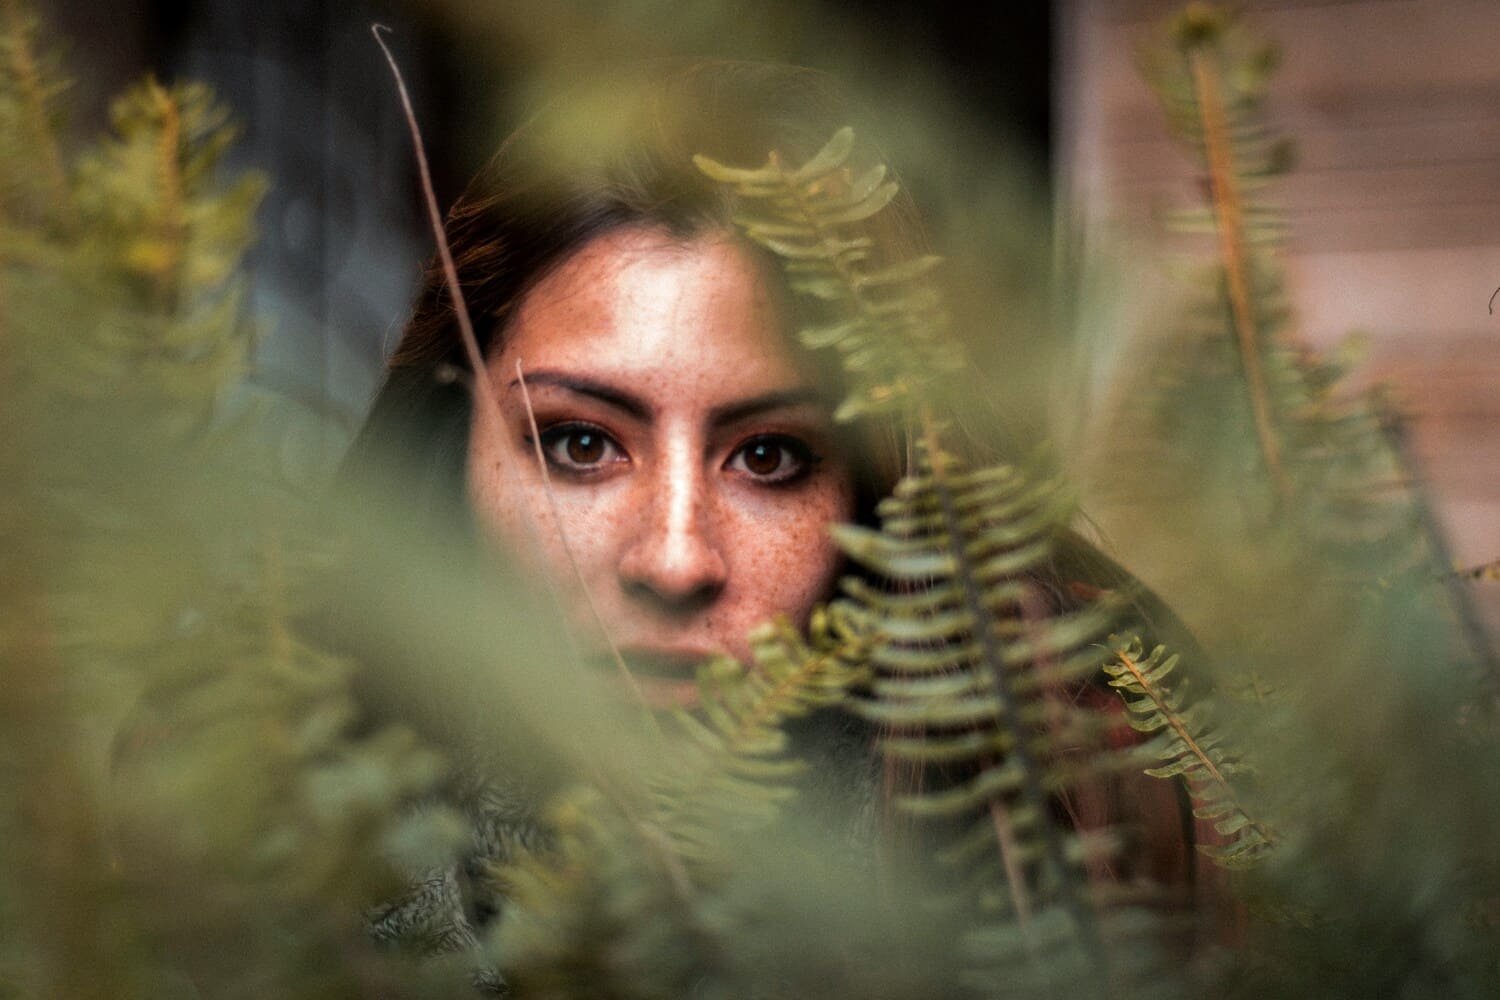
Headshots
Headshots are primarily functional portraits — used for professional profiles, LinkedIn, actors’ comp cards, company websites, speaking bios. They have specific requirements that differ from other portrait work: consistent, neutral background or simple environmental context; sharp focus on face and eyes; clean, flattering light; minimal distraction from the subject.
The most effective headshots communicate personality as well as competence. A headshot that reads as “this is a professional” without communicating anything specific about the person is not achieving what the subject needs from it — something that makes them memorable and approachable rather than interchangeable.
Technical standard: 85mm or 100mm focal length, f/2–f/4, clean background (white, grey, or simple environmental), soft frontal or loop lighting, eye-level camera position. Deliver both colour and black-and-white versions — many platforms and publications still prefer black and white for editorial use.
Environmental Portraits
Environmental portraits place the subject in a context that tells part of their story — a chef in their kitchen, a craftsperson at their workbench, a professor surrounded by books. The environment is not a backdrop to be blurred out but an active participant in the image.
Technical approach: wider aperture for tighter headshots within the set, stopped-down aperture (f/5.6–f/8) for environmental wide shots where both subject and context need to be sharp. Use the space deliberately — position the subject where the environment creates leading lines toward them, where the light from windows or practical fixtures creates interesting quality, where the details of the environment are legible enough to add information.
The challenge in environmental portraits is directing the subject to appear natural in their own space while also photographically compositioning them within it. Allow time for the subject to simply be in their environment before redirecting — the initial awkwardness of a portrait session often resolves into naturalness faster in a familiar environment than in a studio.
Fine Art Portraits
Fine art portrait photography prioritises artistic intent over functional requirements. The image exists as an artefact in itself rather than a record of the subject’s appearance for practical use. Fine art portraiture encompasses the highly conceptual (Cindy Sherman’s self-portraits, Rineke Dijkstra’s series work) and the classically aesthetic (traditional studio portraiture in the Karsh tradition).
Technical range in fine art portraiture is broader than commercial work — deliberate grain, unconventional focus, atypical colour treatment, and experimental composition are all legitimate when they serve the artistic intent. The standard is not “is this technically correct?” but “does this work as an image?”
Personal Branding Photography
Personal branding photography has grown significantly as a commercial portrait category — individual professionals, entrepreneurs, coaches, consultants, and content creators need images for websites, social media profiles, and marketing materials that communicate personality, expertise, and approachability simultaneously.
Personal branding sessions are typically longer than headshot sessions (2–3 hours versus 30–60 minutes), cover more locations and outfits, and produce a wider variety of image types: close headshots, working shots, lifestyle images, detail shots of relevant props or equipment. The output is a library of images for use across all touchpoints of the person’s digital presence.
Direction emphasis in personal branding work: the subject needs to appear at ease, competent, and approachable in equal measure. Stiff, heavily posed images undermine the personal connection the subject is trying to create with their audience. Build extended sessions around activities the person naturally engages in — at their desk, in conversation, during a walk — producing imagery that shows them doing rather than performing.
Street Portraits
Street portraits occupy a unique position: the intimacy of portraiture achieved with strangers in public spaces, often without elaborate direction or extended relationship-building.
The most effective street portraitists — Platon in his crisis-zone work, Brandon Stanton with Humans of New York — have developed a specific approach to quickly establishing enough trust to produce portraits of genuine depth with people they have just met. The technique varies, but common elements include: asking respectfully and specifically (not vaguely), being genuinely curious about the person rather than just the photograph, showing the person the image on the camera screen after shooting (which frequently opens a deeper conversation), and following a brief verbal exchange rather than diving immediately into the camera.
Technically, street portraits often use available light entirely — a 35mm or 50mm prime at f/1.8–f/2.8, available light managed through ISO, no supplemental flash or reflectors that would draw attention. The speed and invisibility of the setup is part of the aesthetic.
Building Rapport: The Foundation of All Portrait Work
Across every portrait sub-genre, the common denominator in consistently strong portrait photography is rapport — the degree of genuine comfort and trust between photographer and subject.
Rapport is not a technique that can be applied mechanically. It is the result of genuine interest in the person being photographed, clear communication about what is happening and what is expected, patient presence that allows the subject’s initial self-consciousness to settle, and honest feedback that builds the subject’s confidence during the session.
Before the session: If the session is planned (rather than a street encounter), communicate in advance. Send a brief email or have a brief call explaining what to expect, what to wear, how long it will take, and what the final images will be used for. Subjects who arrive knowing what to expect are less anxious and more quickly at ease.
At the start of the session: Spend five to ten minutes talking before picking up the camera. This is not wasted time — it is the most efficient way to reduce the self-consciousness that produces stiff, performed portraits. Walk the space together, discuss the light, ask about them. The camera is not the first thing you reach for.
During the session: Maintain running positive feedback. This is not dishonest flattery — it is the accurate communication that good things are happening. “That’s exactly what I’m looking for,” “perfect, hold that,” “your instinct there was right” — these brief acknowledgements reduce anxiety and encourage the subject to keep moving and expressing rather than freezing and waiting for judgment.
When something genuine happens: Stop directing. When you see a real expression, a genuine moment, shoot and continue shooting. Do not interrupt to reposition or redirect until the moment has fully passed. Interrupting a genuine moment to adjust the subject’s hand placement breaks the spontaneity and rarely produces a better image than the uninterrupted version.
Portrait Lighting Diagrams: Three Setups to Know
Setup 1: One-Light Flattering Portrait
Equipment: Medium octabox (36–48 inch), optional reflector
Position the octabox at 45 degrees to the subject, slightly above eye level, approximately 3 feet away. Place a white reflector on the opposite side at waist height to bounce fill back into the shadow side. The key-to-fill ratio with a reflector is typically around 3:1 — enough shadow to produce dimension without appearing too dramatic.
Best for: Headshots, professional portraits, family portraits, any context where a universally flattering, natural-looking result is the goal.
Setup 2: Beauty / Glamour Lighting
Equipment: Beauty dish (22–28 inch), optional reflector beneath face, optional hair light
Position the beauty dish directly in front of the subject, slightly above eye level, aimed slightly downward. The characteristic butterfly shadow under the nose identifies this setup. Place a small reflector below the subject’s chin to fill the under-face shadow and add a catchlight to the lower eyes.
Add a strip box above and behind the subject (aimed downward toward the top of the head) for hair light if hair separation from background is needed.
Best for: Beauty photography, fashion, personal branding work where a polished, high-impact result is wanted.
Setup 3: Dramatic / Rembrandt
Equipment: Medium softbox or beauty dish with grid, no fill
Position a medium softbox at 45 degrees to the subject, raised significantly above eye level. The higher position increases the shadow below the eyes and produces more dramatic sculpting. The grid prevents spill and keeps the background darker, increasing the sense of drama.
No reflector — let the shadow side fall into near-darkness. The Rembrandt triangle should be visible on the shadow cheek.
Best for: Character portraits, fine art portraiture, editorial work where drama and dimension are the priority over universal flattery.
Post-Processing Portrait Images
Portrait retouching occupies a spectrum from corrective to transformative. Where you land on that spectrum should be guided by the purpose of the image and, crucially, by the subject’s expectations and the ethical implications of significant alteration.
Corrective retouching (appropriate for all portrait work): exposure and colour correction, white balance adjustment, temporary skin blemishes (spots, redness, minor bruising), stray hairs that cross the face or distract from the eyes, dust or stains on clothing.
Enhancing retouching (appropriate for commercial, beauty, and personal branding work with subject consent): skin smoothing and texture work, under-eye softening, teeth whitening, reducing (not eliminating) established skin features. The standard: the image should look like the subject on their best day, not like a digitally constructed approximation of an idealised version of them.
Transformative retouching (rarely appropriate): altering facial structure, significantly slimming body proportions, removing established physical features. These alterations misrepresent the subject, set unrealistic expectations for how they look in person, and — particularly in advertising contexts — contribute to documented harm around body image.
Technical portrait post-processing workflow:
- Exposure and white balance — correct overall
- Highlight recovery — pull back any blown skin highlights
- Shadow lift — open shadow detail in eyes and under-chin
- Skin tone — HSL adjustments to correct unwanted colour casts in skin (often a magenta or orange imbalance)
- Spot healing — temporary blemishes only
- Eye enhancement — selective sharpening on iris and catchlight; slight brightening of whites if genuinely needed
- Dodge and burn — subtle contouring of facial structure using very low-opacity dodge and burn layers
- Final colour grade — if applying an overall aesthetic treatment
- Sharpening — last step, applied selectively to areas of the face using a luminosity or edge mask
Further Reading
For the lighting modifiers that produce these setups — softboxes, beauty dishes, umbrellas, strip boxes, and grids — our guide to light modifiers for portrait photography covers every tool with practical setup instructions. For the lens selection that determines portrait perspective and background blur, our photography lenses guide covers focal lengths from 35mm to 135mm in portrait context. For managing ISO and noise in indoor and studio portrait work, our guide to ISO and digital noise management covers the in-camera and post-processing approaches. For building a portrait portfolio that attracts clients in your target niche, our guide to building a photography portfolio covers curation, sequencing, and presentation.
The most useful external resource for studying portrait lighting is the Strobist Lighting 101 archive by David Hobby — the most thorough free resource on flash and studio lighting available. For studying the work of the photographers who have shaped portrait photography historically and contemporarily, the National Portrait Gallery’s online collection provides access to one of the most significant portrait archives in the world.
Final Thoughts
Portrait photography is the most technically and interpersonally demanding genre most photographers work in. It requires simultaneous mastery of the camera, of light, of composition, and of human psychology — and it requires these to work together in real time, often under time pressure, with subjects who are nervous, unfamiliar with the process, and depending on you to make them look and feel like the best version of themselves.
The photographers who consistently produce strong portrait work are not those who have memorised the most lighting diagrams or bought the most flattering lenses. They are the ones who have learned to make subjects forget they are being photographed, who have developed the patience to wait for genuine expression rather than settling for performed expression, and who have built the technical fluency to capture that expression precisely when it arrives.
That combination develops through shooting — a lot of shooting, with a lot of different people, in a lot of different light conditions. The technical foundation in this guide gives you the map. The shooting gives you the territory.

Charles is a passionate photographer and visual storyteller with a keen eye for capturing authentic moments and timeless emotions. Through here, he combines creativity, technical expertise, and a love for natural storytelling to create images that preserve life’s most meaningful memories. His work focuses on genuine connections, beautiful details, and the unique stories behind every photograph.