Neutral Density (ND) filters are essential tools for photographers looking to create stunning long exposure images. By reducing the amount of light entering the lens, ND filters allow you to use slower shutter speeds in bright conditions, opening up a world of creative possibilities. This guide will walk you through everything you need to know about using ND filters for long exposure photography, from selecting the right filter to mastering your technique.
What are ND Filters and Why Use Them?
An ND filter is essentially a “sunglass” for your camera lens. It’s a piece of glass or resin that reduces the amount of light passing through the lens without significantly affecting the color of the scene. This allows you to:
- Use slower shutter speeds in bright light: Create motion blur in moving water, clouds, or crowds, even on a sunny day.
- Shoot with wider apertures in bright light: Achieve shallow depth of field for portraiture or isolating subjects, even when the sun is blazing.
- Capture ethereal skies and silky water: Extend exposure times dramatically for creative effects.
Types of ND Filters
ND filters come in various strengths, each reducing light by a different amount. The strength of an ND filter is typically measured in “stops.” Each stop reduces the light by half.
- Solid ND Filters: These are uniformly dark and reduce light evenly across the entire image. They are the most common type of ND filter.
- Graduated ND Filters (GND): These filters are dark on one half and clear on the other, with a gradual transition between the two. They are used to darken bright skies while leaving the foreground unaffected, balancing the exposure in high-contrast scenes.
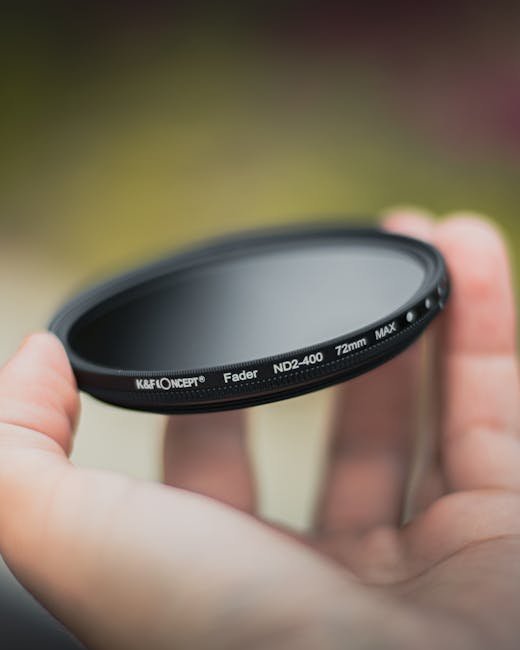
- Variable ND Filters: These filters consist of two polarizing filters that rotate relative to each other, allowing you to adjust the amount of light reduction. They are convenient but can sometimes introduce color casts or uneven darkening.
Understanding ND Filter Strengths
Choosing the right ND filter strength depends on the desired effect and the ambient light conditions. Here’s a general guide:
- 1-3 Stop ND Filter (ND2, ND4, ND8): Slight light reduction, useful for subtle motion blur or shooting with a wider aperture in slightly bright conditions.
- 6 Stop ND Filter (ND64): A versatile option for moderate motion blur, ideal for smoothing water or cloud movement in moderately bright conditions. Many landscape photographers find a 6-stop filter to be a staple in their kit.
- 10 Stop ND Filter (ND1000): Significant light reduction for dramatic motion blur and very long exposures, even in bright daylight. Allows for silky water and ethereal skies.
- 15 Stop ND Filter (ND32000): Extreme light reduction for very long exposures in extremely bright conditions or for creative effects that require ultra-long shutter speeds. As Christian Hoiberg notes, this filter can be invaluable for photographing in the middle of the day when other options are limited.
Choosing the Right ND Filter: Considerations
Several factors come into play when selecting the right ND filter:
- Filter Size: Ensure the filter size matches your lens’s filter thread. Using step-up rings can allow you to use a larger filter on multiple lenses.
- Filter Type: Circular screw-on filters are convenient and easy to use. Square filter systems offer more flexibility, especially when using graduated ND filters.
- Filter Quality: Invest in high-quality filters from reputable brands to avoid color casts, vignetting, or loss of sharpness. Cheaper filters can degrade image quality significantly.
- Stacking Filters: You can stack ND filters to achieve greater light reduction, but be aware that this can sometimes lead to vignetting or color casts.
Essential Equipment for Long Exposure Photography
In addition to ND filters, you’ll need a few other key pieces of equipment:
- Camera: Any camera with manual exposure control (shutter speed, aperture, ISO) will work.
- Lens: Choose a lens appropriate for your subject. Wide-angle lenses are popular for landscapes, while telephoto lenses can isolate distant subjects.
- Tripod: A sturdy tripod is essential to keep your camera still during long exposures.
- Remote Shutter Release: Minimizes camera shake when triggering the shutter. A wired or wireless remote is ideal.
- Lens Cloth and Cleaning Supplies: Keep your lenses and filters clean for optimal image quality.
Step-by-Step Guide to Long Exposure Photography with ND Filters
- Compose Your Shot: Carefully frame your scene and consider the elements you want to capture.
- Set Up Your Tripod: Ensure your tripod is stable and level.
- Determine Base Exposure: Without the ND filter, set your camera to aperture priority mode (Av or A) and choose your desired aperture. Note the shutter speed the camera selects. Alternatively, use your camera’s light meter in manual mode to determine a balanced exposure.
- Calculate Exposure with ND Filter: Use the following table (or a photography app) to calculate the new shutter speed needed with the ND filter attached.
ND Filter Stop Reduction to Shutter Speed Conversion1 stop: Double the shutter speed2 stops: Multiply shutter speed by 43 stops: Multiply shutter speed by 86 stops: Multiply shutter speed by 6410 stops: Multiply shutter speed by 102415 stops: Multiply shutter speed by 32768Example: If your base exposure is 1/60th of a second without the filter, and you’re using a 10-stop ND filter, your new shutter speed would be approximately 17 seconds (1/60 x 1024).
- Switch to Manual Mode: Set your camera to manual mode (M) and dial in the calculated shutter speed and aperture.
- Set ISO: Use the lowest ISO possible (usually ISO 100) to minimize noise.
- Attach ND Filter: Carefully attach the ND filter to your lens.
- Focus Your Shot: Focus before attaching the ND filter, as it can make it difficult to see through the viewfinder. Switch to manual focus to prevent the camera from refocusing during the exposure.
- Disable Image Stabilization: Turn off image stabilization (IS or VR) on your lens, as it can sometimes cause blurry images when using a tripod.
- Take the Shot: Use a remote shutter release or the camera’s self-timer to trigger the shutter and avoid camera shake.
- Review and Adjust: Check the image on your camera’s LCD screen. Adjust the shutter speed as needed to achieve the desired effect. Pay attention to the histogram to ensure proper exposure.
Troubleshooting Common Issues
- Color Casts: Some ND filters can introduce color casts, especially variable ND filters. Correct these in post-processing using white balance adjustments.
- Vignetting: Using multiple filters or a wide-angle lens can cause vignetting (darkening of the corners). Crop the image or use lens correction tools in post-processing to fix this.
- Blurry Images: Ensure your tripod is stable and that you’re using a remote shutter release. Check for wind or other vibrations that could be affecting the camera.
- Overexposure or Underexposure: Adjust the shutter speed accordingly. Use the histogram as a guide.
Post-Processing Tips
Post-processing is an essential part of long exposure photography. Use software like Adobe Lightroom or Photoshop to:
- Adjust Exposure and Contrast: Fine-tune the overall brightness and contrast of the image.
- Correct Color Casts: Use the white balance tool to neutralize any color casts introduced by the ND filter.
- Reduce Noise: Long exposures can sometimes introduce noise, especially in the shadows. Use noise reduction tools sparingly to avoid softening the image too much.
- Sharpening: Apply sharpening to bring out details in the image.
- Local Adjustments: Use adjustment brushes or graduated filters to selectively adjust specific areas of the image, such as the sky or foreground.
Creative Ideas for Long Exposure Photography
- Silky Waterfalls: Capture the smooth, flowing motion of waterfalls by using a long exposure.
- Ethereal Clouds: Create dreamy, streaking clouds by using a very long exposure on a windy day.
- Ghostly Figures: Capture blurred figures moving through a scene to create a sense of motion or absence.
- Light Trails: Photograph car headlights or taillights moving along a road to create streaks of light.
- Star Trails: Capture the apparent movement of stars across the night sky by using a very long exposure (often several hours).
Conclusion
Long exposure photography with ND filters is a rewarding technique that allows you to capture scenes in unique and creative ways. By understanding the principles of ND filters, mastering your equipment, and experimenting with different settings, you can unlock a world of photographic possibilities. Don’t be afraid to experiment and push your creative boundaries!