Every photographer started somewhere. Some began with a film camera borrowed from a parent. Some picked up photography in school and never put it down. Most, these days, start by realising the camera on their phone isn’t quite capturing what their eye is seeing — and wanting to understand why, and how to fix it.
Photography is one of the most accessible creative disciplines in existence. The barrier to entry is low, the feedback is immediate, and the path from taking decent snapshots to making genuinely compelling images is shorter than most beginners expect. What it requires is not expensive equipment but a clear understanding of a small number of foundational principles — and the willingness to practice them until they become instinct.
This guide covers those principles from the ground up.
What Photography Actually Is
At its most literal, photography is the process of recording light. The word itself comes from the Greek phos (light) and graphé (drawing) — light drawing. A camera is essentially a light-tight box with a lens at one end that focuses light onto a recording surface at the other — originally a chemically-treated plate or film, now a digital sensor.
But that technical description misses what photography is as a practice. Photography is a decision-making process. Every image you make is the result of a series of choices: where to stand, when to press the shutter, which elements to include in the frame, how much light to let in and for how long. Some of those decisions are technical. Others are purely aesthetic. The interplay between those two kinds of decisions is what makes photography a craft.
The most important shift a beginner can make is from thinking “I take photos” to thinking “I make images.” The first framing is passive — you point the camera and press a button. The second is active — you are constructing something, with intention, from the materials available.
How a Camera Works: The Core Principle
You don’t need to understand camera engineering to take good photographs, but understanding the basic optical principle helps everything else make sense.
A camera lens collects light from the scene in front of it and focuses that light onto the sensor (or film). The sensor is made up of millions of tiny light-sensitive pixels. Each pixel records how much light it received during the exposure. The camera’s processor combines all those readings to build the final image file.
The three variables you control to determine how much light reaches the sensor — and in what manner — are aperture, shutter speed, and ISO. Together they form what photographers call the exposure triangle.
The Exposure Triangle: Aperture, Shutter Speed, and ISO
Aperture
The aperture is an opening inside the lens — a diaphragm of overlapping blades — that can be widened or narrowed to control how much light passes through. It’s measured in f-stops: f/1.4, f/2, f/2.8, f/4, f/5.6, f/8, f/11, f/16.
Counterintuitively, smaller f-numbers mean larger apertures (more light), and larger f-numbers mean smaller apertures (less light). An aperture of f/1.8 is wide open; f/16 is nearly closed.
Aperture does two things simultaneously: controls light and controls depth of field — how much of the scene is in sharp focus from front to back. A wide aperture (f/1.8) produces a shallow depth of field: the subject sharp, the background blurred. A narrow aperture (f/11) produces a deep depth of field: everything from near to far appears sharp.
This is why portraits are often shot wide open (creamy blurred backgrounds, subject isolated) and landscapes shot stopped down (everything from the foreground rocks to the distant mountains sharp).
Shutter Speed
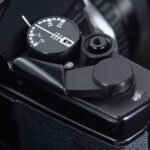
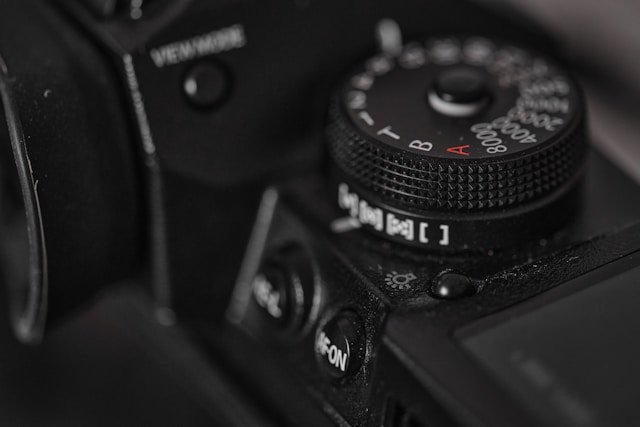
The shutter is a curtain in front of the sensor that opens and closes to admit light. Shutter speed controls how long that curtain stays open: 1/1000s, 1/250s, 1/60s, 1/15s, 1 second, 30 seconds.
A fast shutter speed (1/500s or faster) freezes motion — a sprinter caught mid-stride, a wave suspended before it breaks, a bird’s wings in a sharp position. A slow shutter speed blurs motion — a waterfall becomes a silky white stream, car headlights streak into light trails, a person walking through a frame disappears entirely over a long enough exposure.
Shutter speed also interacts with camera shake. Handholding a camera at 1/30s introduces enough movement during the exposure to cause blur. A rough guide for handheld shooting: keep shutter speed at or above the reciprocal of your focal length — at 50mm, shoot at 1/50s or faster; at 200mm, 1/200s or faster.
ISO
ISO measures the sensitivity of the sensor to light. At ISO 100 (base ISO), the sensor records light with minimal amplification — the cleanest, least noisy image. At ISO 3200 or 6400, the signal is amplified significantly to compensate for dim conditions — enabling faster shutter speeds in low light — but introducing digital grain (noise) in the process.
The practical rule: keep ISO as low as conditions allow. Use aperture and shutter speed first; raise ISO only when the other two variables have reached their limits.
How the Three Work Together
Each variable compensates for the others. If you increase shutter speed to freeze action, you reduce the light reaching the sensor — so you must either open the aperture wider, raise the ISO, or accept an underexposed image. If you stop down the aperture for a deep depth of field, you reduce light — so you must slow the shutter, raise ISO, or add more light to the scene.
Photography is a constant negotiation between these three variables, weighted by what matters most in the shot you’re making.
It works by bouncing light from the strobe off a central deflector plate before it hits the parabolic dish surface and reflects forward. This creates an even, slightly wraparound light with a distinctive circular catchlight.
Standard sizes: 16–22 inches for tight headshots; larger 24–28 inch versions work better for three-quarter portraits.
Silver vs. white interior: Silver beauty dishes produce a punchier, more contrasty result. White interior versions are softer and more flattering for skin.
Classic beauty dish placement: Mount it slightly above eye level, pointed directly at the subject’s face — this is called “beauty lighting” or “butterfly lighting” (named after the butterfly-shaped shadow it creates under the nose). The dish should be close, around 2–3 feet from the subject’s face, for maximum effect.
Add a sock or grid: A fabric diffuser (“sock”) stretched over the front of a beauty dish softens it further. A grid restricts the light and prevents spill onto the background.
Understanding Light: The Most Important Skill in Photography
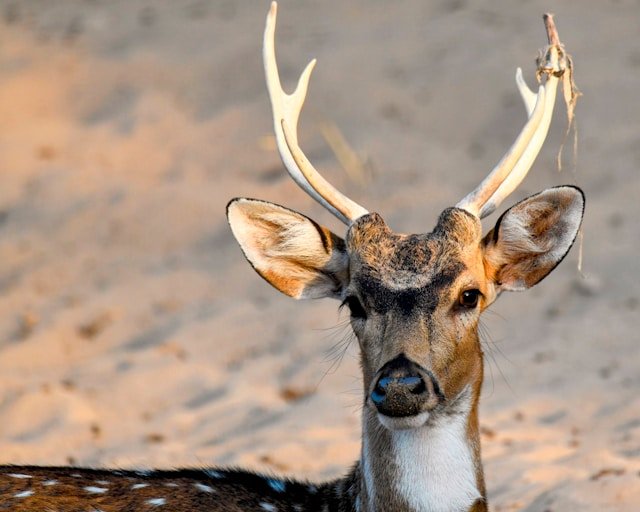
Technical mastery of exposure is useful. Understanding light is transformative.
Every photograph is made of light — its direction, quality, colour, and intensity determine more about the final image than almost any other factor. Learning to see light rather than just subjects is the single biggest perceptual shift a developing photographer can make.
Direction of Light
Front lighting (light source behind the camera) is flat and even — it eliminates shadows and texture. Often unflattering for portraits; creates a “passport photo” quality.
Side lighting (light from the left or right) creates shadows that reveal texture and three-dimensionality. Side light makes skin, fabric, stone, and bark come alive with detail. It’s the most versatile direction for most subjects.
Backlighting (light from behind the subject) creates rim lighting, halos, and silhouettes. More challenging to expose correctly but produces some of the most visually distinctive results — particularly at golden hour when the sun is low.
Quality of Light
Hard light comes from small, direct sources — a bare flash, direct sun in a clear sky. It creates defined, high-contrast shadows with sharp edges. Dramatic, sometimes unflattering.
Soft light comes from large or diffused sources — an overcast sky, a window, a softbox, light bounced off a wall. It creates gentle, gradual shadows with no hard edge. Generally flattering, particularly for portraits.
The sun is hard light at midday and soft light on an overcast day — the same source, dramatically different quality.
The Golden Hour and Blue Hour
The hour after sunrise and the hour before sunset — the golden hour — produce warm, low-angle light that is flattering to almost every subject. Shadows are long and directional. Colour temperature shifts to orange and amber. For outdoor photography of any kind, this is the most reliable time to shoot.
The brief period after sunset (or before sunrise) — blue hour — produces a cool, diffused ambient light with no direct sun. Cityscapes, seascapes, and architecture shot during blue hour have a distinctive quality that’s difficult to replicate at any other time.
Composition: How to Arrange Elements in the Frame
Exposure controls how the image is technically rendered. Composition determines what the image is actually about — what draws the eye, what the viewer reads first, and what emotional response the image produces.
Rule of Thirds
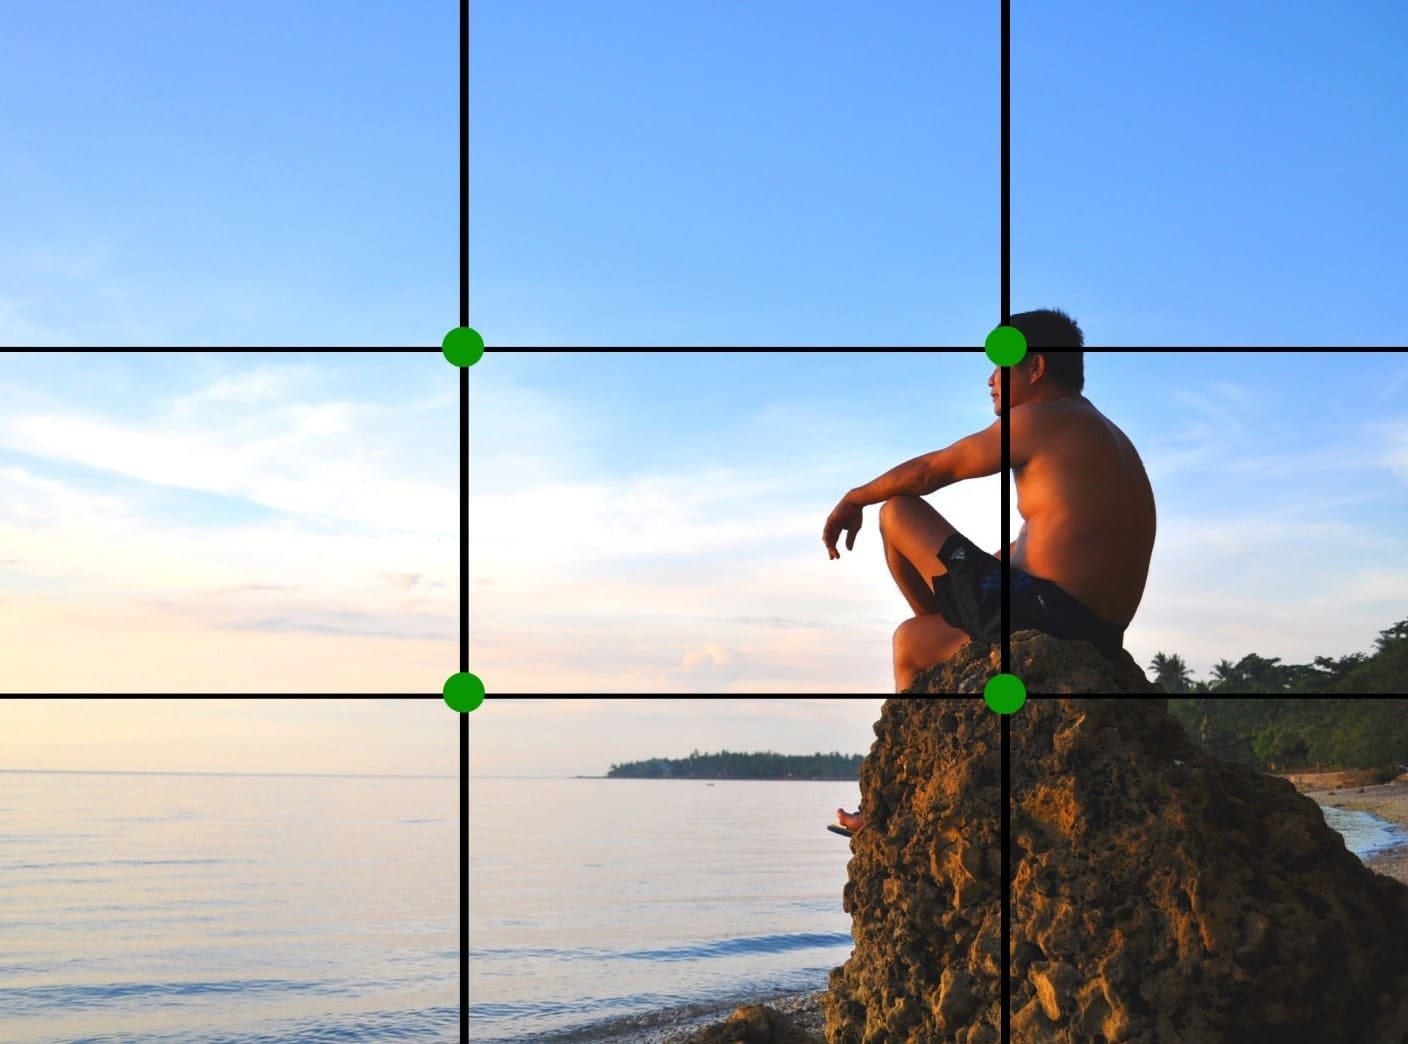
Divide the frame into a 3×3 grid of nine equal rectangles. The four intersection points of those grid lines are visually strong positions. Placing your subject’s eyes, a horizon line, or a key element at one of these intersections creates a more dynamic, naturally-balanced image than centring everything.
Most cameras can display a rule-of-thirds grid overlay in the viewfinder or live view — enable it and use it until placement by feel becomes natural.
Leading Lines
Roads, rivers, fences, paths, shadows, and architectural lines that run from the foreground into the distance draw the viewer’s eye into the image and create a sense of depth. Position yourself so these natural lines lead toward your subject.
Foreground Interest
Including a strong foreground element — a rock, a flower, a puddle reflection — in a landscape image creates depth and a sense of being immersed in the scene rather than observing it from a distance.
Simplifying the Frame
Most beginner images contain too much. The temptation is to include everything. Strong photography usually means deciding what to leave out. Move closer, change your angle, or use shallow depth of field to eliminate distracting background elements. The strongest images typically have one clear subject and everything else subordinated to it.
Breaking the Rules
The rule of thirds, leading lines, and other compositional guidelines are starting points — not laws. Once you understand why they work, you can break them purposefully. A centred, symmetrical composition can be powerful when symmetry is the point. A horizon placed exactly in the middle of a frame can work when the reflection below mirrors the sky above. Learn the rules well enough to break them with intention.
Choosing Your First Camera and Lens
The best camera for a beginner is one that gets out of the way and lets you practise. You do not need a flagship professional camera. More pixels, more autofocus points, and more weather sealing do not make better photographs — the photographer does.
Entry-level mirrorless or DSLR cameras from Canon, Nikon, Sony, and Fujifilm all produce excellent image quality at beginner price points. Any current entry-level interchangeable-lens camera is technically capable of producing professional-grade images in competent hands.
The kit lens — the 18-55mm or 16-50mm zoom that comes bundled with most camera bodies — is underrated. It covers a useful range, is optically decent, and teaches you to work with zoom rather than relying on an ideal prime focal length. Start with the kit lens and learn its limitations before buying anything else.
The 50mm prime (or 35mm on crop sensor cameras) is the classic first prime lens purchase. It produces a natural-looking perspective similar to human vision, has a wide maximum aperture (typically f/1.8) for shallow depth of field and low light capability, and is available inexpensively from every major manufacturer. It will immediately reveal what your kit zoom’s slower maximum aperture has been hiding.
Smartphones: Modern flagship smartphones are genuinely capable cameras for many applications. If you’re starting out and uncertain about the investment, shooting seriously on a smartphone first is a legitimate path. The compositional and light-reading skills you develop transfer entirely to a dedicated camera when you’re ready.
Shooting Modes: Which to Use When
Auto mode makes all decisions for you. Use it when you need a shot fast and don’t have time to think — but recognise that Auto mode cannot know what you intend. It doesn’t know if the motion blur it’s creating is a problem or a feature.
Aperture Priority (A or Av) lets you set the aperture; the camera selects shutter speed to achieve correct exposure. Use this for portraits (where you control depth of field), landscapes, and most static subjects. This is the mode most photographers use most of the time.
Shutter Priority (S or Tv) lets you set the shutter speed; the camera selects aperture. Use this for action photography where a minimum shutter speed is required to freeze motion.
Manual mode (M) gives you full control over both aperture and shutter speed. Essential for studio work, long exposures on a tripod, and any situation where the camera’s metering would be fooled by unusual lighting conditions.
Program mode (P) is Auto with overrides — the camera sets both aperture and shutter speed, but you can shift the combination or override settings as needed. A useful middle ground for learning.
RAW vs JPEG: A Decision Worth Making Early
JPEG files are processed in-camera: the camera applies sharpening, noise reduction, colour profiles, and compression before writing the file. The result is a smaller, ready-to-use image — but one where the camera has made irreversible decisions about the data.
RAW files preserve the full sensor output with no in-camera processing. They are larger, require editing software to process, and demand more time — but they give you complete control over how the image is rendered. Recovering a slightly overexposed sky, correcting white balance, reducing noise, adjusting contrast — all are done with far more flexibility in a RAW file than a JPEG.
The recommendation for anyone serious about improving: shoot RAW from the start. Use Lightroom, Capture One, or the free Darktable to process your files. The learning curve is modest and the control you gain is significant.
Developing Your Eye: The Practice That Matters Most
Technical knowledge only improves images if it’s paired with genuine visual attention — the practice of actually looking at the world with the intention of understanding how it might translate to a photograph.
Carry a camera (or use your phone) every day. Not to produce finished work, but to practise seeing. Look at where the light is coming from. Notice how shadows create shape. Observe which elements in a scene draw your eye and think about why.
Study the work of photographers whose images you admire. Don’t just enjoy the images — analyse them. Where is the light coming from? What is in focus and what isn’t? Where is the subject in the frame, and why does it work? This analytical viewing of strong work is one of the fastest routes to improving your own.
Shoot a lot and review critically. Not everything needs to be shared, and most of what you produce early on won’t be. That’s exactly as it should be. Volume of practice with honest evaluation of results is how the technical and the aesthetic become second nature.
Photography Genres: Finding Your Direction
Photography covers an enormous range of subjects and approaches. Part of developing as a photographer is discovering which genres resonate with you most deeply.
Portrait photography focuses on people — capturing personality, emotion, and connection. It requires both technical precision (focus on the eyes, flattering light) and interpersonal skill (making subjects comfortable, directing expression and posture).
Landscape photography works with natural environments — mountains, coastlines, forests, deserts. It rewards patience, early mornings, and a willingness to return to the same location repeatedly as conditions change.
Street photography documents life in public spaces — the spontaneous, unposed moments of human behaviour in urban environments. It demands quick reflexes, spatial awareness, and a degree of social confidence.
Wildlife photography requires specialist telephoto equipment, fieldcraft knowledge, and substantial patience. The images it produces — animals in natural behaviour, unaware of the camera — are among the most compelling in photography.
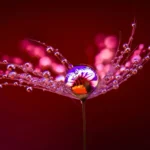
Macro photography explores the miniature world: insects, flowers, water droplets, textures invisible to the naked eye. It requires close-focusing lenses and careful technique but opens up a visual world most people have never seen.
For a deeper exploration of the full range of photographic genres and what each demands technically and creatively, the Genres section of Haiku Photography Blueprint covers each major category in detail.
The Gear Trap: A Warning Every Beginner Needs
Photography has a thriving gear culture — forums, YouTube channels, and review sites devoted to comparing cameras, lenses, and accessories. This culture is engaging, but it can become a trap.
The belief that better equipment will produce better photographs is one of the most persistent and damaging myths in photography. A photographer with a deep understanding of light, composition, and timing will produce stronger images on an entry-level camera than a beginner with a professional body. Every working photographer has a collection of their strongest images taken on modest equipment.
Buy what you need to do the work you want to do. Upgrade when your current equipment is genuinely limiting what you can make — not because something newer was announced. The hours you’d spend researching your next camera purchase are almost always better spent shooting with the one you have.
Gear Recommendations by Budget
For understanding the technical fundamentals in greater depth, our dedicated guides cover autofocus modes (AF-S vs AF-C), ISO and digital noise management, and how circular polarizer filters improve images. For the broader historical context of what photography is and where it came from, our guide to the history of photography traces the medium from the camera obscura to the smartphone era.
For external learning, the New York Institute of Photography’s free resources offer well-structured beginner content. Ken Rockwell’s camera guides — while opinionated — contain practical, jargon-free explanations of camera settings that many beginners find useful.
Final Thoughts
Photography is a craft that rewards consistent practice more than any other single factor. The technical elements — exposure, focus, white balance — become automatic with repetition, freeing your attention for the compositional and emotional decisions that actually make an image worth looking at.
Start simply. One camera, one lens, available light, subjects you care about. Understand the exposure triangle well enough to use manual or aperture priority mode confidently. Learn to see light as the primary material you’re working with. Study work you admire analytically rather than just appreciatively.
The gap between where you start and where you want to be closes faster than you expect — if you’re actually shooting rather than reading about shooting. The best time to go make photographs is now.

Charles is a passionate photographer and visual storyteller with a keen eye for capturing authentic moments and timeless emotions. Through here, he combines creativity, technical expertise, and a love for natural storytelling to create images that preserve life’s most meaningful memories. His work focuses on genuine connections, beautiful details, and the unique stories behind every photograph.